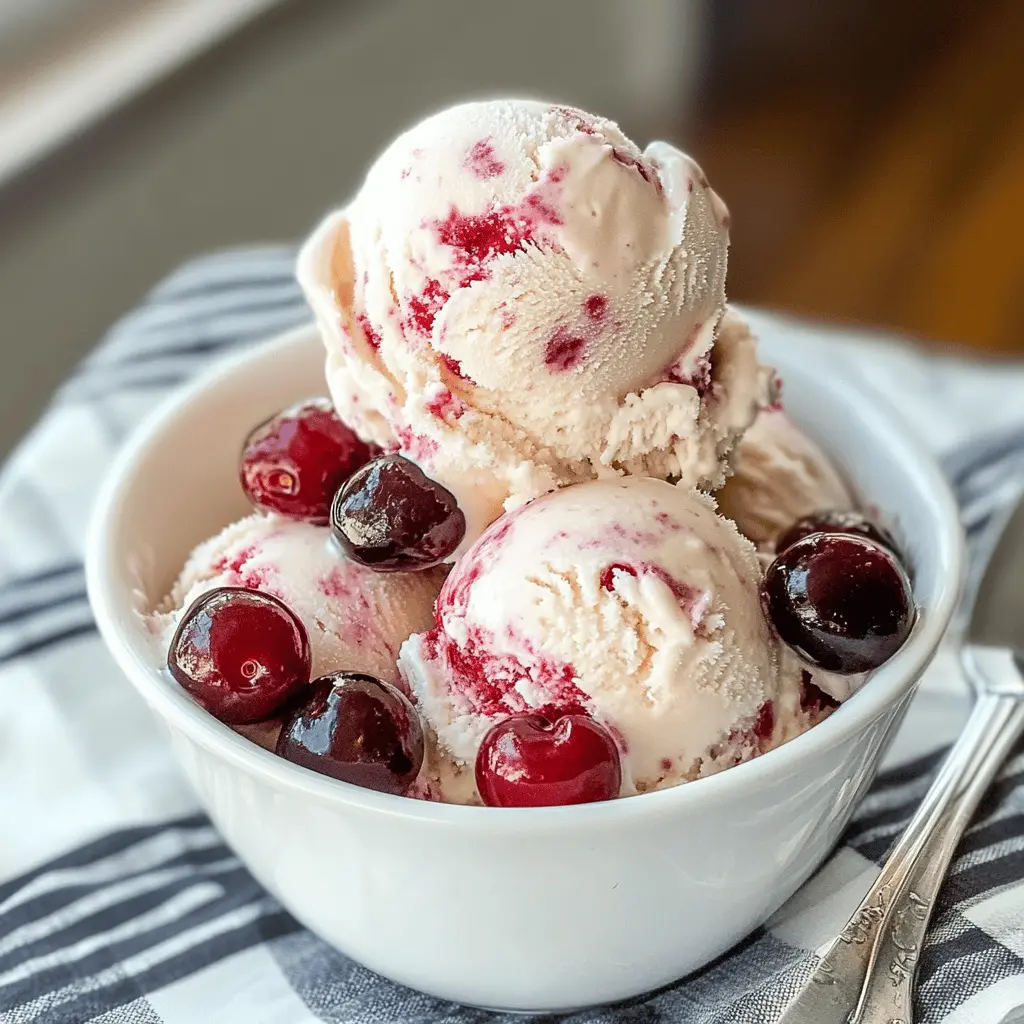
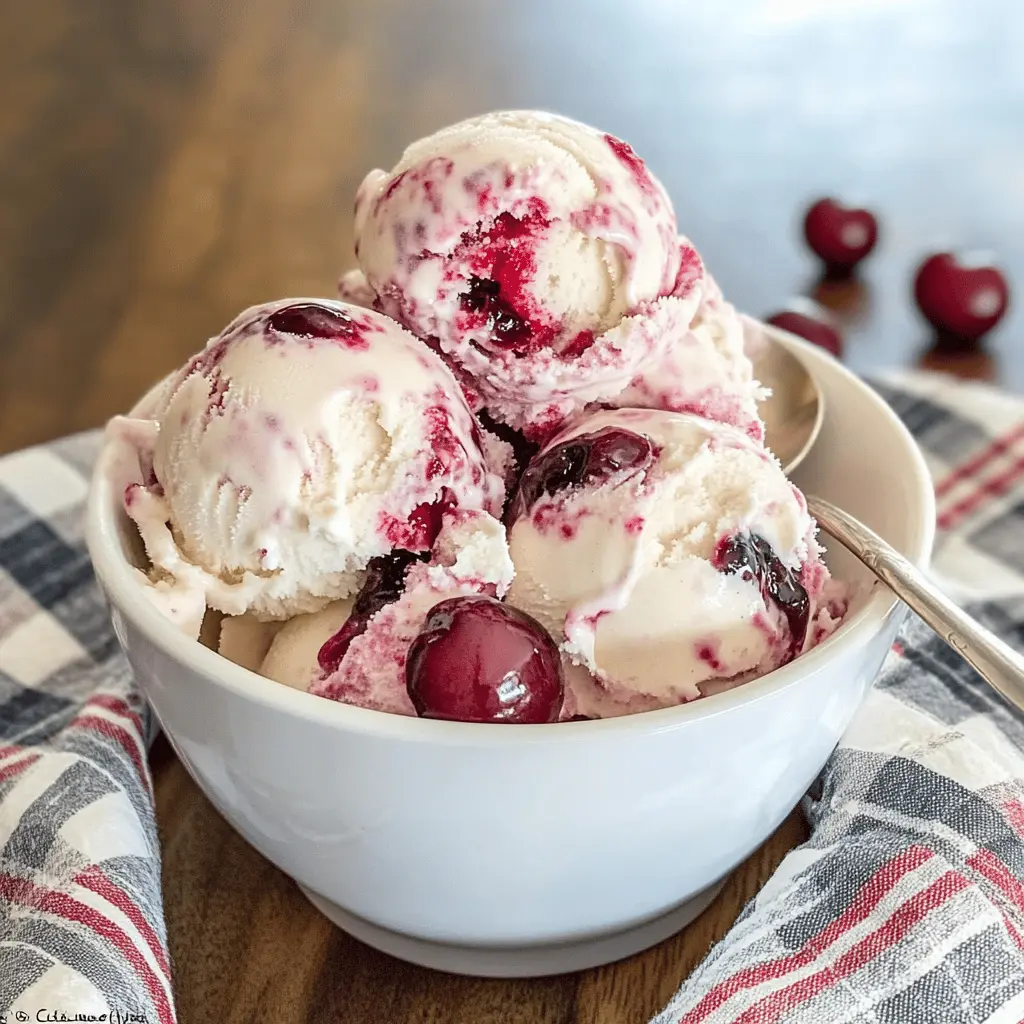
This Easy Homemade Cherry Vanilla Ice Cream is a sweet treat that’s perfect for summer! With fresh cherries and smooth vanilla, it’s creamy and oh-so-delicious.
Making it is a breeze! You just mix everything together and freeze. I love enjoying a bowl on a hot day, and with this flavor, who can resist a second scoop? 🍦
Key Ingredients & Substitutions
Cherries: Fresh cherries are fantastic, but if they’re out of season, frozen cherries work well too. Just make sure they are pitted! If you’re looking for a twist, feel free to use other fruits like raspberries or strawberries.
Sugar: For a lighter option, you can substitute granulated sugar with honey or maple syrup, but keep in mind it may alter the flavor slightly. Some people like using coconut sugar for a hint of caramel flavor.
Heavy Cream: If you want a lighter version, try using half-and-half instead, but the ice cream may be less creamy. You could also use a non-dairy cream option if you prefer a dairy-free recipe.
Vanilla Extract: Pure vanilla extract gives the best flavor, but if you’re in a pinch, imitation vanilla will suffice. Alternatively, vanilla bean paste can add lovely specks of vanilla throughout!
How Do You Create Creamy Ice Cream Without an Ice Cream Maker?
Making ice cream without an ice cream maker is possible and easy with a simple technique! If you don’t have one, follow these steps for creamy results:
- After mixing the base, pour it into a freezer-safe container.
- Freeze for about 45 minutes. When it starts to freeze around the edges, take it out and stir vigorously with a fork or whisk. This breaks up ice crystals.
- Return to the freezer and repeat the stirring process every 30 minutes for about 3 hours.
- Let it set for a few hours before serving for a firmer texture.
This technique helps keep your ice cream creamy and smooth, so you can enjoy your cherry vanilla treat even without an ice cream maker!
Easy Homemade Cherry Vanilla Ice Cream
Ingredients You’ll Need:
- 2 cups fresh or frozen cherries, pitted and halved
- 1/4 cup granulated sugar (for cherries)
- 2 cups heavy cream
- 1 cup whole milk
- 3/4 cup granulated sugar (for ice cream base)
- 1 tablespoon pure vanilla extract
- 1 pinch of salt
- (Optional) 1 teaspoon lemon juice (to brighten cherry flavor)
How Much Time Will You Need?
This recipe takes about 15 minutes of prep time, plus approximately 20-25 minutes of churning time in the ice cream maker. After that, it needs to freeze for at least 4 hours or overnight to become firm. In total, you’ll need about 5 hours and 15 minutes – but most of that is just waiting to enjoy your yummy ice cream!
Step-by-Step Instructions:
1. Prepare the Cherry Mixture:
In a small saucepan, combine the pitted and halved cherries with 1/4 cup of sugar. Cook over medium heat, stirring occasionally, until the cherries soften and release their juices, which should take about 5-7 minutes. If you want to enhance the cherry flavor, add the optional lemon juice. Once done, remove from heat and let the mixture cool completely.
2. Make the Ice Cream Base:
In a mixing bowl, combine the heavy cream, whole milk, 3/4 cup of sugar, pure vanilla extract, and a pinch of salt. Whisk everything together until the sugar is fully dissolved. This will create a rich and creamy base for your ice cream.
3. Combine Cherry and Cream Mixtures:
Once the cherry mixture has cooled down, gently stir it into the cream mixture. Make sure to fold it carefully to create beautiful and tasty swirls of cherry throughout the ice cream.
4. Churn the Ice Cream:
Pour the combined mixture into your ice cream maker. Churn according to the manufacturer’s instructions, which usually takes about 20-25 minutes. The mixture should thicken and become creamy during this process.
5. Freeze and Firm Up:
Once churned, transfer the ice cream to a freezer-safe container. For the best results, let it freeze for at least 4 hours or overnight to achieve a firmer texture. This will ensure your ice cream is ready to scoop and serve!
6. Serve and Enjoy:
When you’re ready to indulge, scoop the creamy cherry vanilla ice cream into bowls. Enjoy it on its own, or sprinkle some extra cherries or chocolate on top if you’d like. Happy eating!
This recipe makes about 1 quart of ice cream, filled with luscious cherry swirls and rich vanilla flavor. Perfect for sharing on a warm day!
FAQ for Easy Homemade Cherry Vanilla Ice Cream
Can I Use Frozen Cherries Instead of Fresh?
Absolutely! Frozen cherries work great in this recipe. Just make sure they’re pitted before using. If they’re still frozen, you can thaw them slightly in the microwave or let them sit out for a bit before cooking.
What if I Don’t Have an Ice Cream Maker?
No worries! You can still make delicious ice cream without one. Simply follow the mixing instructions and pour the mixture into a freezer-safe container. Freeze for 45 minutes, then stir vigorously every 30 minutes for about 3 hours until creamy.
How Do I Store Leftover Ice Cream?
Store any leftover ice cream in an airtight container in the freezer. To keep it fresh for longer, press a piece of plastic wrap directly onto the surface before sealing it with a lid. It should last for about 2-3 weeks.
Can I Make This Ice Cream Dairy-Free?
Yes, you can! Substitute the heavy cream and whole milk with full-fat coconut milk or other non-dairy cream alternatives. Just be sure to check that they have a similar fat content to achieve a creamy texture!