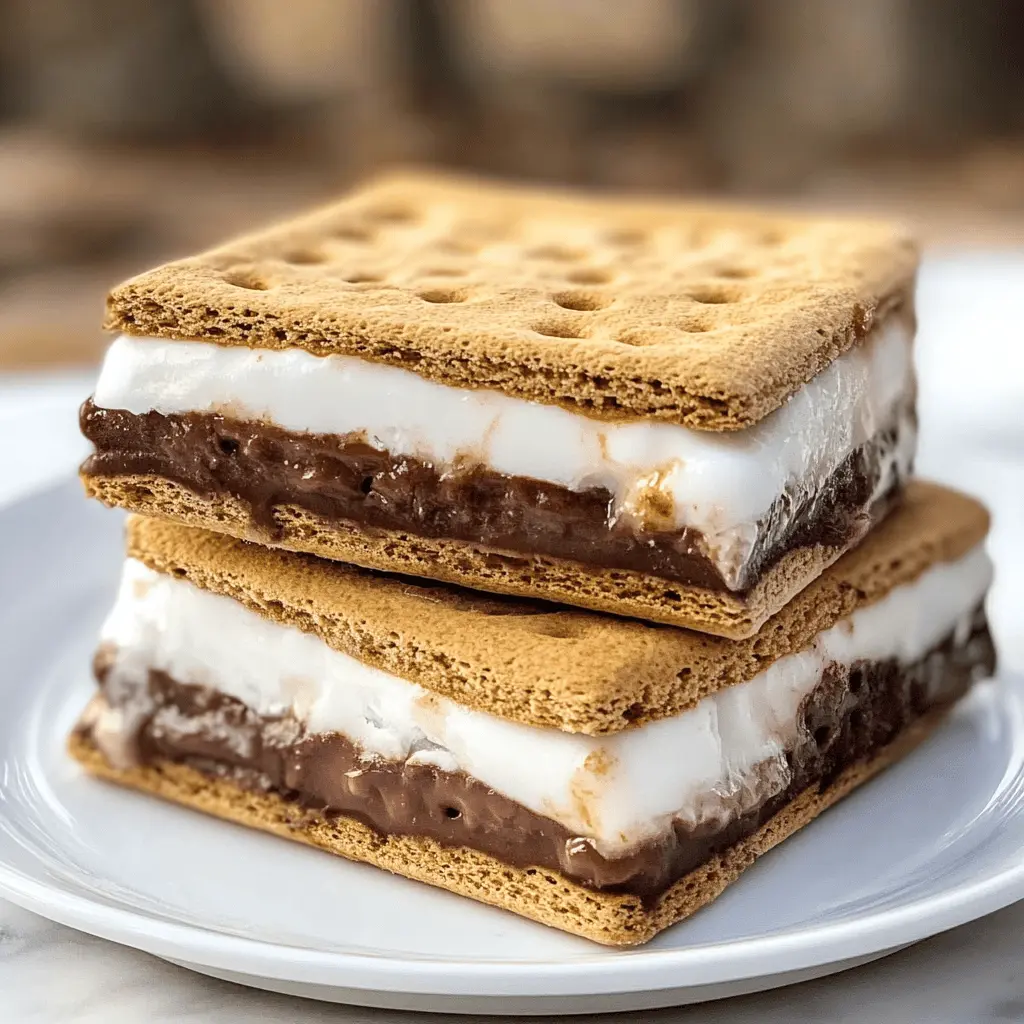
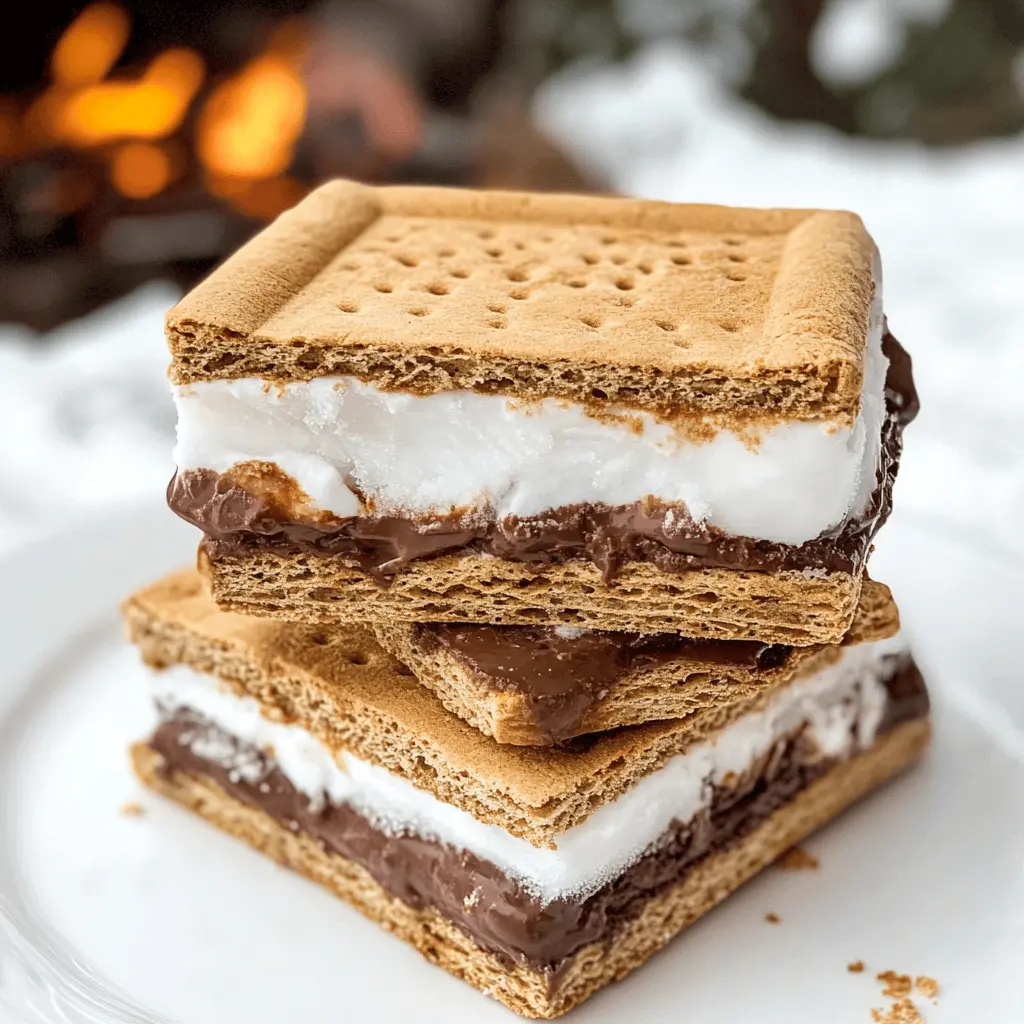
Frozen S’mores are a fun twist on the classic treat! With layers of chocolate, marshmallows, and graham crackers, they’re cool and creamy, perfect for hot days.
These bites of joy disappear fast at my house! I love making a big batch and sharing them with friends—it’s hard to eat just one! 🍫🍪
Key Ingredients & Substitutions
Graham Crackers: These are essential for the classic s’mores texture. If gluten-free, consider using gluten-free graham crackers or crushed vanilla cookies to achieve a similar crunch.
Chocolate Ice Cream: You can switch to chocolate frozen yogurt if you’re looking for a lighter option. Vanilla ice cream also works well if you want a twist. Just add extra cocoa or chocolate chips for a chocolatey flavor.
Marshmallow Fluff: Fluff is smooth and easy to spread, but you can use regular marshmallows. Just melt them slightly before spreading to make it easier. You can also substitute it with whipped cream for a lighter option.
Whipped Cream: This ingredient is optional but adds a nice creaminess. You can substitute it with whipped coconut cream for a non-dairy alternative. It’s delicious too!
Mini Chocolate Chips: For a crunchy addition, mini chocolate chips enhance the texture. If you don’t have these, you can finely chop regular chocolate or use crushed nuts instead!
How Do You Ensure Smooth Layers in Your Frozen S’mores?
To create those perfect layers in your frozen s’mores, it’s all about spreading evenly and lightly. Here’s how to do it:
- After placing the first layer of graham crackers, take your time smoothing the chocolate ice cream using a spatula. Aim for an even thickness.
- For the marshmallow layer, if you combine it with whipped cream, fold gently to keep it light. Spread it carefully on top of the ice cream.
- Repeat this process for the second layer—ensure that each layer is evenly distributed before adding the next one.
This attention to detail will help you achieve beautifully layered frozen s’mores! Enjoying the delightful combinations is even better when they look just as good as they taste.
How to Make Frozen S’mores?
Ingredients You’ll Need:
For the Layers:
- 1 box graham crackers (about 14 crackers)
- 2 cups chocolate ice cream (or chocolate frozen yogurt)
- 1 cup marshmallow fluff (or marshmallows)
- 1/2 cup whipped cream (optional for extra creaminess)
- 1/2 cup mini chocolate chips (optional for added texture)
How Much Time Will You Need?
This delicious frozen treat takes about 15 minutes to prepare, plus 4 hours to freeze. You’ll spend just a few minutes layering the ingredients, and then it’s time to wait for your sweet creation to solidify. Perfect for a warm day or a fun dessert!
Step-by-Step Instructions:
1. Prepare the Pan:
Start by lining an 8×8 inch square baking pan with parchment paper. Make sure to leave some parchment hanging over the edges. This will help you lift the frozen s’mores out of the pan later—easy peasy!
2. Add the First Layer:
Now, take your graham crackers and place a layer at the bottom of the prepared pan. Don’t worry if you need to break some of them to fit just right. Aim for a crust-like base; this is the start of your s’mores!
3. Spread the Chocolate Ice Cream:
Next, grab your chocolate ice cream and scoop half of it onto the graham crackers. Use a spatula to spread it out evenly. Try to cover every bit of the crackers for a delicious first layer!
4. Add the Marshmallow Layer:
Now it’s time for the sweetness! Spread the marshmallow fluff over the chocolate ice cream layer. If you’re using whipped cream, fold it in with the marshmallow fluff for a lighter, fluffier texture before spreading it.
5. Another Ice Cream Layer:
Grab the remaining chocolate ice cream and spread it evenly on top of the marshmallow fluff layer. Make sure it’s all nicely smoothed out. This will add another rich chocolatey surprise!
6. Finish with Grahams:
Take another layer of graham crackers and place it on top of the last ice cream layer. Gently press them down to secure everything in place.
7. Optional Topping:
If you’d like some extra crunch, sprinkle mini chocolate chips over the top layer of graham crackers. This adds great texture that you’ll love!
8. Freeze:
Cover the pan with plastic wrap and pop it into the freezer. Let it freeze for at least 4 hours, or until the ice cream is completely firm. Patience is key here!
9. Cut and Serve:
When you’re ready to enjoy, take the pan out of the freezer. Use the parchment paper overhang to lift the frozen s’mores out. Place them on a cutting board and cut into squares.
10. Enjoy Your Frozen Treat!
Now that you’ve made your frozen s’mores, it’s time to dig in! Enjoy your delicious treat with family and friends. Perfect for a warm day or as a fun dessert!
Can I Use Different Ice Cream Flavors?
Absolutely! Feel free to experiment with any flavor of ice cream you like. Vanilla or strawberry can add a nice twist, or even mint chocolate chip for a fun variation. Just keep in mind that different flavors will give your s’mores a unique taste!
Can I Substitute the Marshmallow Fluff?
Yes, if you prefer, you can use regular marshmallows instead of marshmallow fluff. Just cut them in half and layer them over the ice cream. If you’re using whole marshmallows, consider toasting them lightly first for added flavor!
How to Store Leftover Frozen S’mores?
Store any leftovers in an airtight container or wrap them tightly with plastic wrap. They can be kept in the freezer for up to 2 weeks. Just make sure to slice them before storing for easy access later!
Can I Make This Recipe Gluten-Free?
Yes! You can easily make this dessert gluten-free by using gluten-free graham crackers. Just check the label to ensure they are certified gluten-free. All other ingredients are typically gluten-free; just double-check as needed!