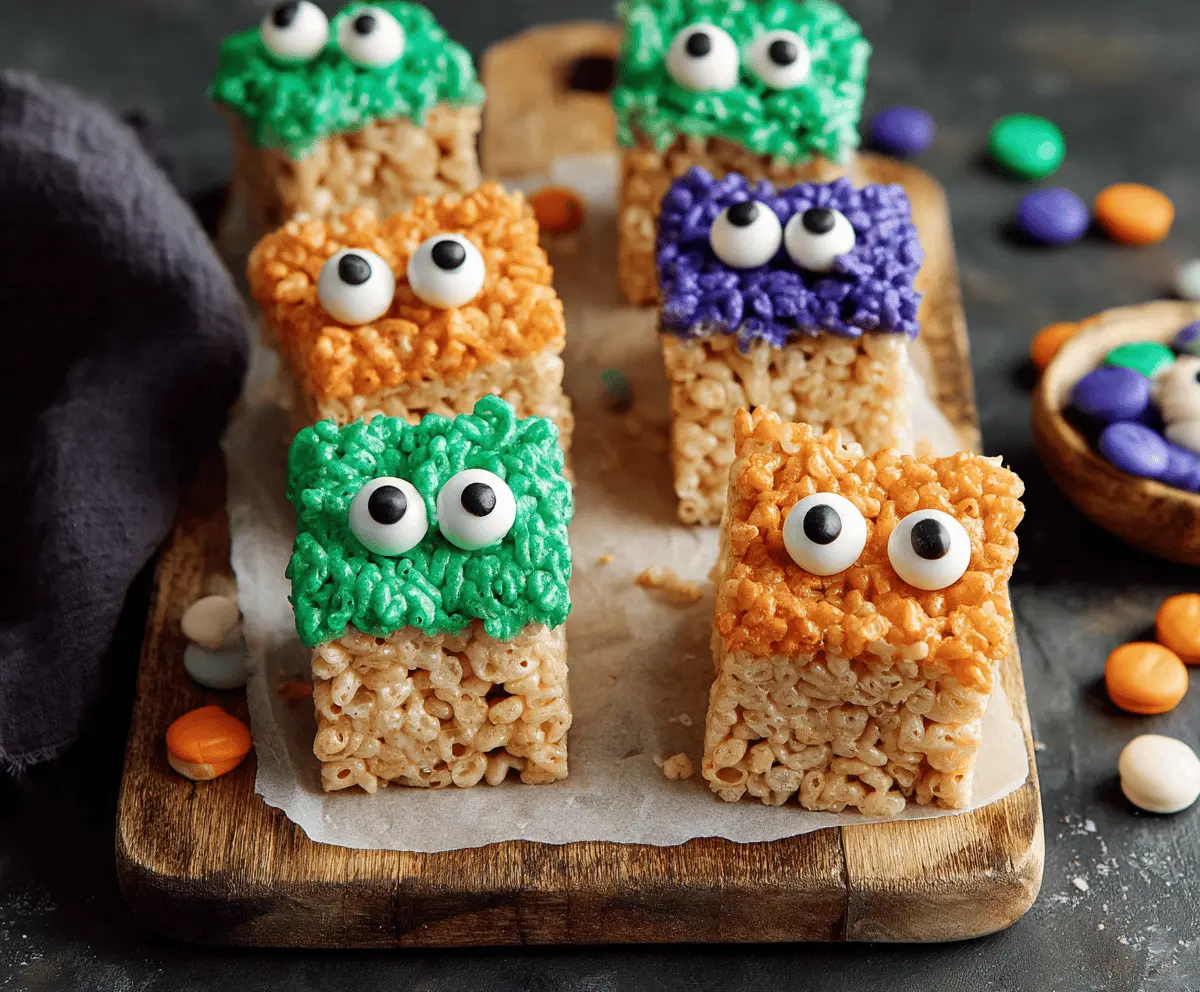
Meet your new favorite no-bake treat: Monster Rice Krispie Treats—gooey, buttery bars studded with colorful candies, mini marshmallows, and playful candy eyes. They’re the perfect mash-up of nostalgia and Halloween fun, with a soft-chewy bite that holds its shape without turning dry. Make a pan for classroom parties, bake-sale tables, or a movie night marathon; these bars slice cleanly, travel well, and disappear fast.
What makes them “monster”? A few playful upgrades to the classic: extra marshmallows for pockets of goo, a touch of vanilla for bakery flavor, and just enough salt to balance the sweetness. Fold in your favorite mix-ins—think M&M-style candies, chopped chocolate, or sprinkles—and finish with goofy candy eyes on top. They come together on the stovetop in minutes and set quickly, so you can decorate and serve with minimal fuss.
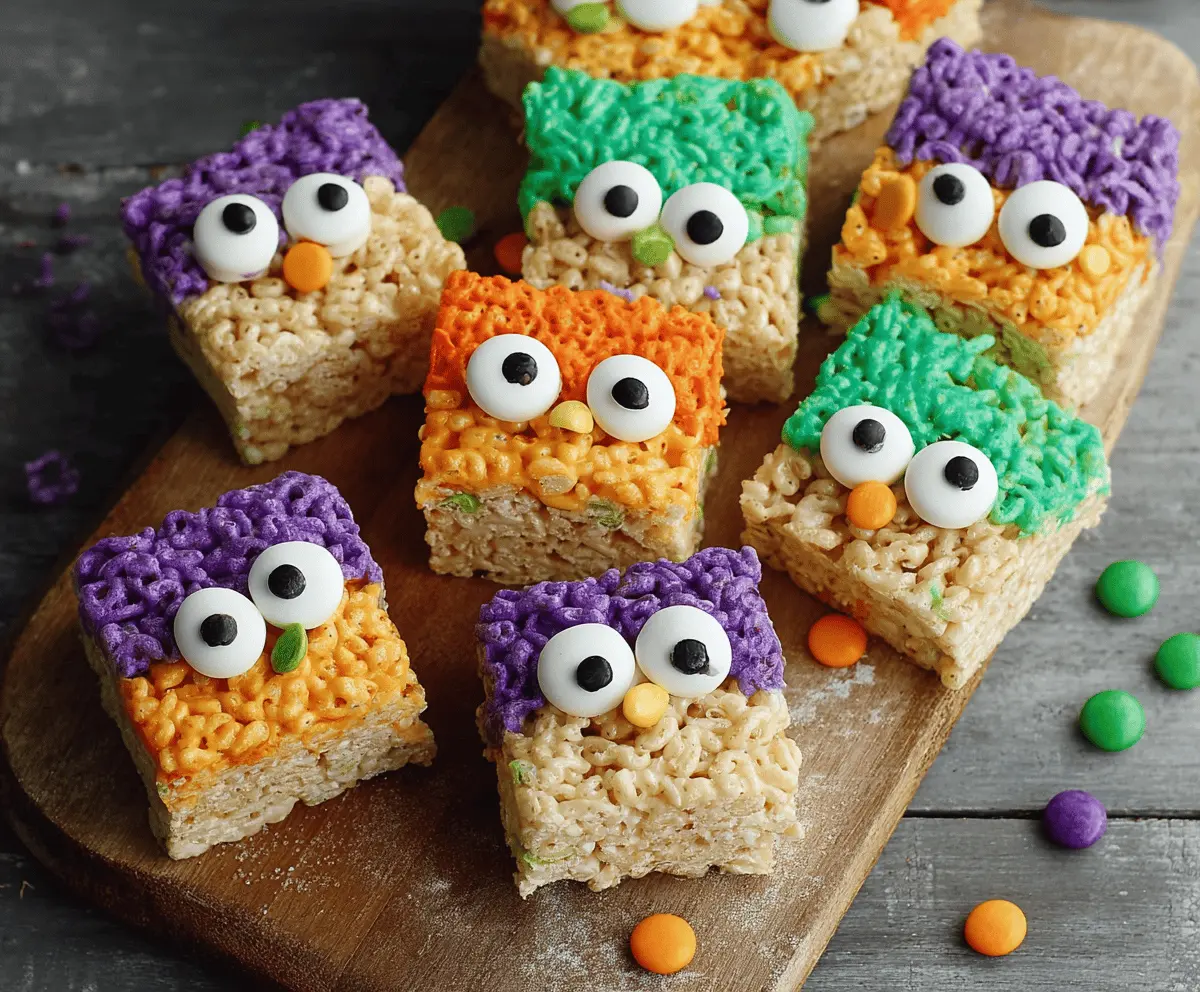
These bars are endlessly riffable, party-friendly, and delightfully over-the-top without being fussy. Keep them simple for everyday snacking, or go full monster mode with vibrant colors and different eye sizes for a pan that makes everyone grin.
Key Ingredients & Substitutions
A handful of pantry staples plus fun mix-ins deliver soft, chewy treats that slice like a dream. Here’s how to adapt them to your taste or pantry.
Rice Krispies cereal: The classic crisped rice cereal gives light crunch. Store-brand crisped rice works fine; for gluten-free needs, choose a certified GF variety.
Mini marshmallows: Melted marshmallows bind the bars; holding back a cup to fold in at the end creates gooey pockets. If using large marshmallows, chop them or measure by weight.
Butter: Unsalted butter keeps flavor clean. Salted butter works—just reduce the added salt. Brown the butter for a nutty twist.
Vanilla & salt: A splash of vanilla rounds the sweetness; a pinch of salt sharpens flavor so bars taste buttery, not cloying.
Candy mix-ins: M&M-style chocolates are sturdy and colorful. Use chopped chocolate bars, mini chocolate chips (fold in when slightly cool), or peanut butter chips. For nut-free classrooms, stick to candies and sprinkles.
Candy eyes: The signature “monster” touch. Use various sizes for whimsy; mini chocolate chips work in a pinch.
Optional color: Gel food coloring tints the marshmallow mixture vibrant hues. Liquid coloring can soften the set; add sparingly.
Equipment You’ll Need
- 9×13-inch baking pan (metal preferred for clean edges)
- Parchment paper or foil (for lining)
- Large heavy pot or deep saucepan
- Heatproof spatula (silicone) or wooden spoon
- Measuring cups and spoons
- Nonstick spray or a little extra butter (to lightly grease)
Flavor Variations & Add-Ins
- Peanut butter monster: Stir 1/2 cup creamy peanut butter into the melted marshmallow mixture; top with peanut butter chips and candy eyes.
- Cookies & scream: Fold in 1 cup crushed chocolate sandwich cookies and use mini eyes all over the top.
- Spooky confetti: Add 1/2–3/4 cup Halloween sprinkles (fold in off heat so colors don’t bleed).
- Salted caramel swirl: Drizzle 1/3 cup warmed caramel over the parchment-lined pan before pressing in the mixture; add flaky salt.
- Mint monster: Mix in 1/2 teaspoon peppermint extract and 3/4 cup chopped thin mints; tint the marshmallow mixture green.
- Monster mash-up: Split the batch and tint each half a different color; marble them together in the pan before topping with eyes.
How to Make Monster Rice Krispie Treats
Ingredients You’ll Need:
- 6 cups Rice Krispies (crisped rice) cereal
- 10 cups mini marshmallows, divided (about 16 oz)—8 cups to melt + 2 cups folded in
- 6 tablespoons unsalted butter
- 1 teaspoon pure vanilla extract
- 1/4 teaspoon fine sea salt
- 1–1 1/2 cups candy-coated chocolates (M&M-style) or mix of candies/chips
- Assorted candy eyes, for topping
- Optional: gel food coloring (1–2 drops), 1/2 cup white or dark chocolate chips for drizzle
How Much Time Will You Need?
About 10 minutes on the stovetop, 5 minutes to press and decorate, and 30–45 minutes to set. Total: roughly 50–60 minutes (mostly hands-off while cooling).
Step-by-Step Instructions:
1. Prep the pan
Line a 9×13-inch pan with parchment, leaving an overhang for easy lifting. Lightly grease the parchment and a heatproof spatula with butter or spray to prevent sticking.
2. Melt the butter & marshmallows
In a large pot over low heat, melt the butter. Add 8 cups mini marshmallows and stir constantly until just melted and smooth. Remove from heat. Stir in vanilla and salt (and gel coloring, if using).
3. Fold in the cereal & extras
Working quickly, add the cereal and stir to coat. Let the mixture cool 30–45 seconds so it’s warm but not hot, then fold in the remaining 2 cups mini marshmallows and about two-thirds of the candies (reserving some for the top). This keeps pockets of goo and prevents candy coatings from melting.
4. Press into the pan
Scrape mixture into the prepared pan. Using the greased spatula—or a piece of lightly greased parchment—press gently into an even layer. Don’t compact too firmly, or the bars will be dense.
5. Decorate
While still warm and sticky on top, scatter the reserved candies and gently press in assorted candy eyes so they adhere. For a drizzle finish, melt chocolate chips in short 10-second bursts in the microwave and zigzag over the surface.
6. Cool, slice & serve
Let set at room temperature until firm enough to slice, about 30–45 minutes. Lift out using the parchment overhang and cut into 20–24 squares. Store covered at room temperature.
Pro Tips for Best Texture & Taste
These little moves keep your bars soft-chewy, not tough, with picture-perfect tops.
- Low and slow: Melt marshmallows over low heat. High heat can turn them stiff and sticky-gummy.
- Hold some mallows back: Folding in extra mini marshmallows at the end creates gooey bites throughout.
- Don’t overpack: Press gently into the pan so the bars stay airy and tender.
- Warm fold-ins: Let the mixture cool slightly before adding candies to avoid color bleed.
- Butter the tools: A greased spatula and parchment make pressing and release a breeze.
Frequently Asked Questions
Can I make these ahead?
Yes. Monster Treats keep well at room temperature in an airtight container for 2–3 days. For best texture, avoid refrigerating (it firms them up). If stacking, separate layers with parchment so the eyes and candies don’t smudge.
How can I make them nut-free or allergy-friendly?
Use nut-free candies (check labels) and gluten-free crisped rice if needed. Dairy-free butter sticks work well; verify marshmallows are suitable for your dietary needs.
Why did my bars turn hard?
Likely overheated marshmallows or pressing too firmly. Keep heat low, remove from heat as soon as melted, and press gently. A tablespoon of extra butter can soften the mixture next time.
Can I use regular marshmallows?
Yes—use about 16 ounces total. Cut large marshmallows into quarters so they melt faster, and reserve some to fold in at the end if you want goo pockets.