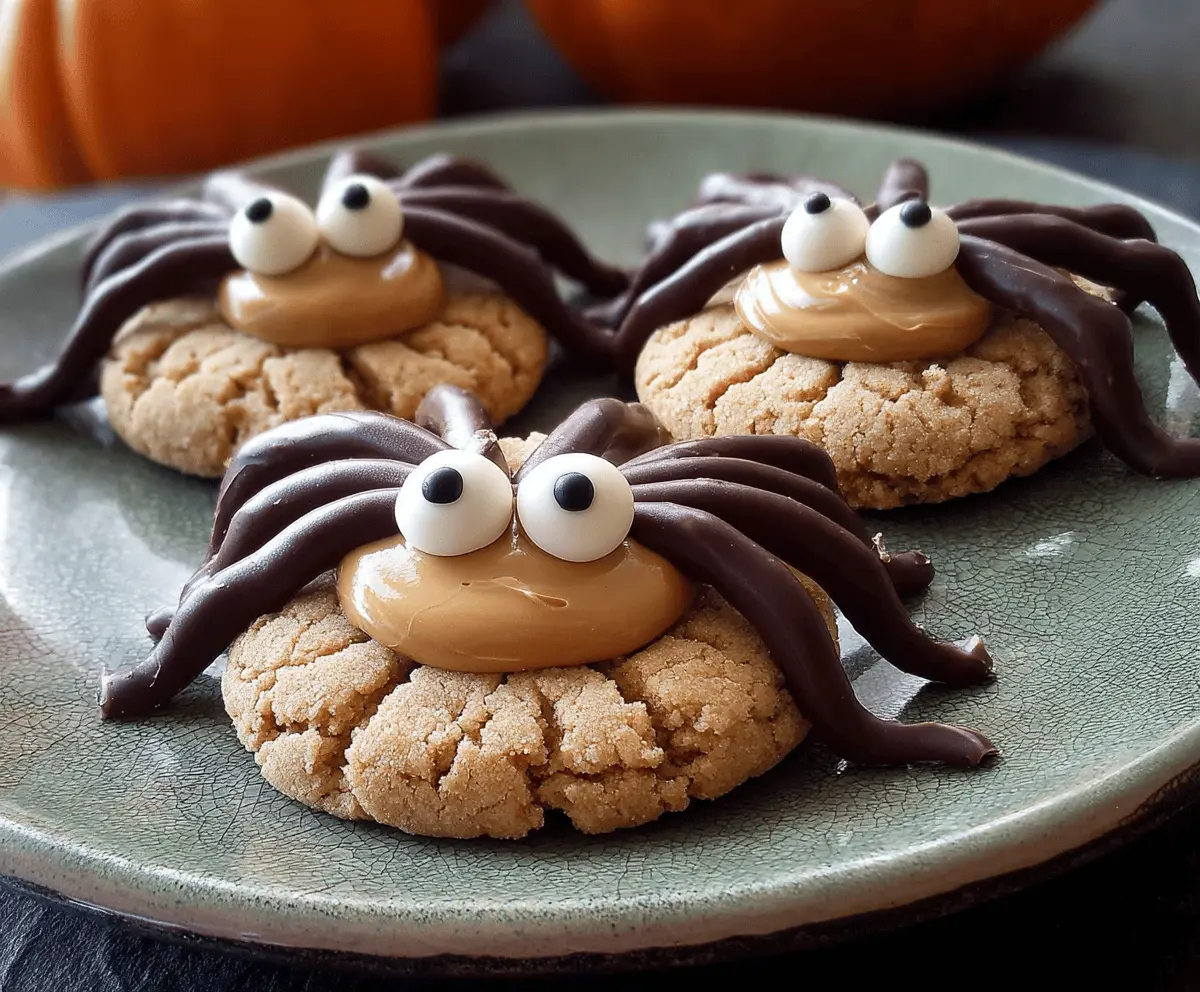
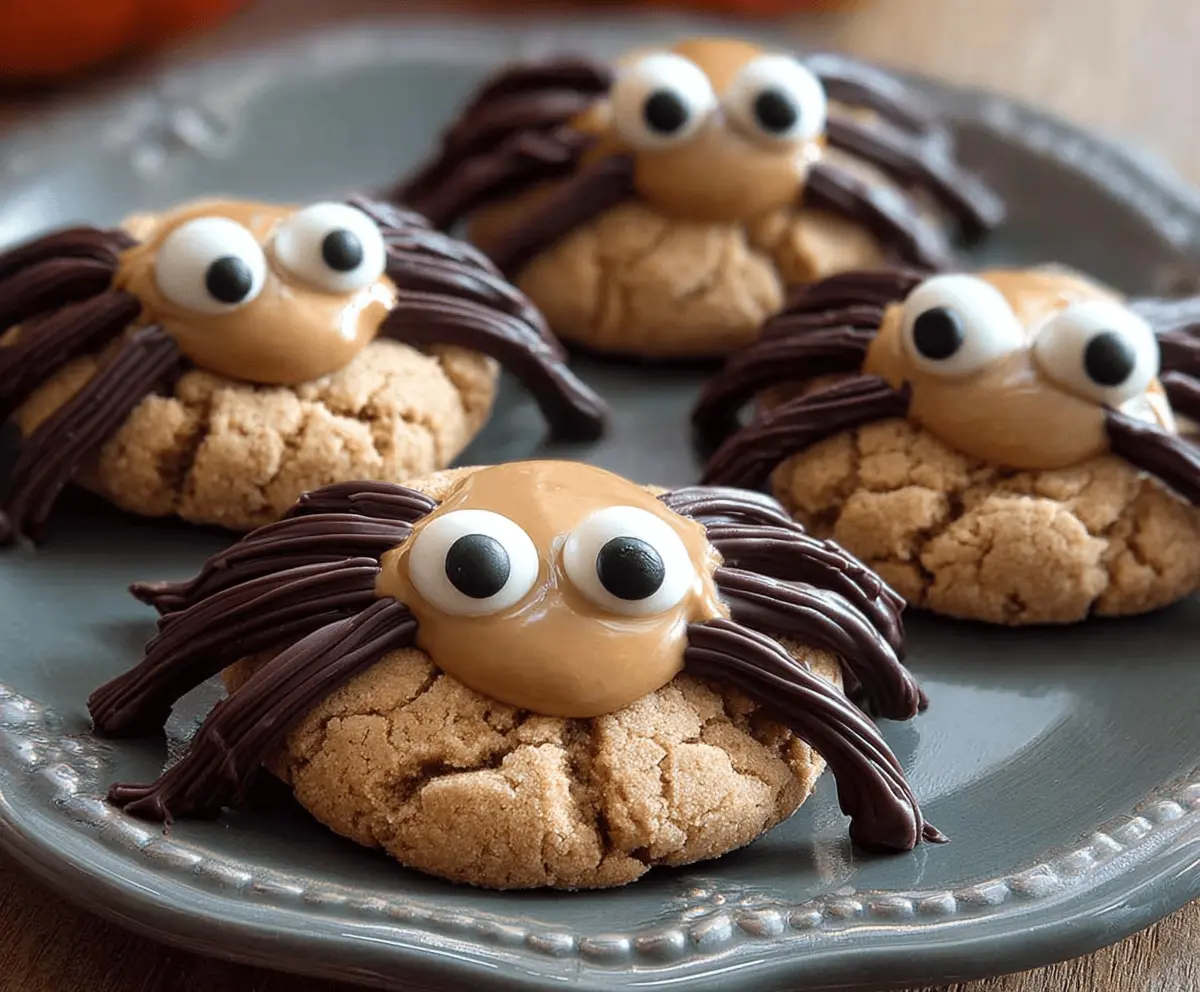
Peanut Butter Spider Cookies are a fun and tasty treat! They are soft cookies with a rich peanut butter flavor, topped with chocolate and pretzels to look just like little spiders!
These cookies are perfect for Halloween or whenever you want to add a bit of fun to your baking. I love making these with my kids, and we can’t help but laugh as we add the little pretzel legs!
Key Ingredients & Substitutions
Unsalted Butter: Softened butter is crucial for the right texture. You can replace it with coconut oil for a dairy-free option, just remember the texture may change slightly.
Creamy Peanut Butter: Regular creamy peanut butter works best. If you prefer, you can use natural peanut butter, although it may change the cookie’s texture a bit. Sunflower seed butter is a great nut-free alternative!
Chocolate Candy Melts: These give you those perfect spider legs! If you can’t find them, feel free to use chocolate chips, just melt and drizzle with a fork to create thin legs.
Candy Eyes: You can find candy eyes easily in the baking aisle. If not available, mini chocolate chips can work for a different but cute look!
How Can I Make Sure My Spiders Look Great?
Creating those cute spider shapes is all about patience and a bit of technique. Start by melting chocolate carefully, so it doesn’t burn. A microwave in short bursts works well!
- To make legs, spread melted chocolate onto parchment paper in thin lines or use a piping bag.
- Make sure they’re cool and hard before touching them.
- For the spider body, use a generous amount of peanut butter. It helps keep everything in place!
Don’t hesitate to have fun with how you position the legs! Each spider can look unique! Enjoy decorating as much as eating!
Peanut Butter Spider Cookies
Ingredients You’ll Need:
For the Cookie Dough:
- 1/2 cup (1 stick) unsalted butter, softened
- 1/2 cup granulated sugar
- 1/2 cup packed brown sugar
- 1/2 cup creamy peanut butter
- 1 large egg
- 1 teaspoon vanilla extract
- 1 cup all-purpose flour
- 1/2 teaspoon baking soda
- 1/4 teaspoon salt
- 1/4 cup granulated sugar (for rolling)
For the Spider Decorations:
- 10 oz chocolate candy melts or chocolate chips (for spider legs)
- Candy eyes (about 24 for 12 cookies)
- 1/2 cup creamy peanut butter (for spider body topping)
How Much Time Will You Need?
This delightful recipe takes about 15 minutes to prepare and 10-12 minutes to bake. After baking, you’ll want to let them cool for a bit, so set aside about 30-40 minutes in total to make these spooky treats!
Step-by-Step Instructions:
1. Preheat the Oven:
Start by preheating your oven to 350°F (175°C). While the oven heats up, line your baking sheet with parchment paper to prevent the cookies from sticking.
2. Make the Cookie Dough:
In a large bowl, cream together the softened butter, 1/2 cup granulated sugar, and brown sugar using a hand mixer or whisk until it becomes smooth and fluffy. Next, mix in 1/2 cup peanut butter, the egg, and vanilla extract until everything is well combined.
3. Combine Dry Ingredients:
In a separate bowl, whisk together the all-purpose flour, baking soda, and salt. Gradually add this dry mixture to the peanut butter mixture, stirring until just combined. You don’t want to overmix!
4. Shape the Cookies:
Scoop out tablespoons of dough and roll each piece into a ball. Roll each ball in the 1/4 cup of granulated sugar, then place them on the prepared baking sheet, making sure to leave about 2 inches of space between each ball. Gently flatten each dough ball with the palm of your hand.
5. Bake the Cookies:
Place the baking sheet in your preheated oven and bake for 10 to 12 minutes, or until the edges are set and you see some cracks forming on the cookie surface. When they’re ready, take them out of the oven and let them cool on the pan for about 5 minutes before transferring them to a wire rack to cool completely.
6. Create the Spider Decorations:
While the cookies cool, melt the chocolate candy melts or chocolate chips according to the package instructions. You can spread the melted chocolate onto parchment paper to create thin “legs” or use a piping bag to pipe out spider leg shapes on wax paper. Let them set until hard.
7. Assemble Your Spiders:
Once the cookies are cool, take about 1 teaspoon of peanut butter and spread it on the center of each cookie to form the spider’s body. Place two candy eyes on top of the peanut butter for the face.
8. Add the Legs:
Carefully position the chocolate legs on each side of the peanut butter to make your spider decorations. Allow the cookies to set for a few minutes before serving, so everything holds together nicely.
Enjoy your cute and tasty Peanut Butter Spider Cookies! They are sure to be a hit with both kids and adults.
Can I Use Natural Peanut Butter Instead of Creamy Peanut Butter?
Yes, you can use natural peanut butter, but keep in mind that it may alter the texture slightly. Natural peanut butter tends to be runnier, which might result in a softer cookie.
Can I Make These Cookies Ahead of Time?
Absolutely! You can prepare the cookie dough and refrigerate it for up to 3 days before baking. Just make sure to let the dough sit at room temperature for about 15 minutes before rolling and baking for even results.
What Should I Do with Leftover Cookies?
Store any leftover cookies in an airtight container at room temperature for up to 4 days. If needed, you can refrigerate them for a longer shelf life—just make sure to bring them back to room temperature before serving for the best flavor!
How Can I Make Spider Legs Without Piping?
If you don’t have a piping bag, you can simply spread melted chocolate onto parchment paper using a spoon in thin strands to mimic spider legs. Or, drizzle the chocolate in zigzag patterns to create a fun effect!