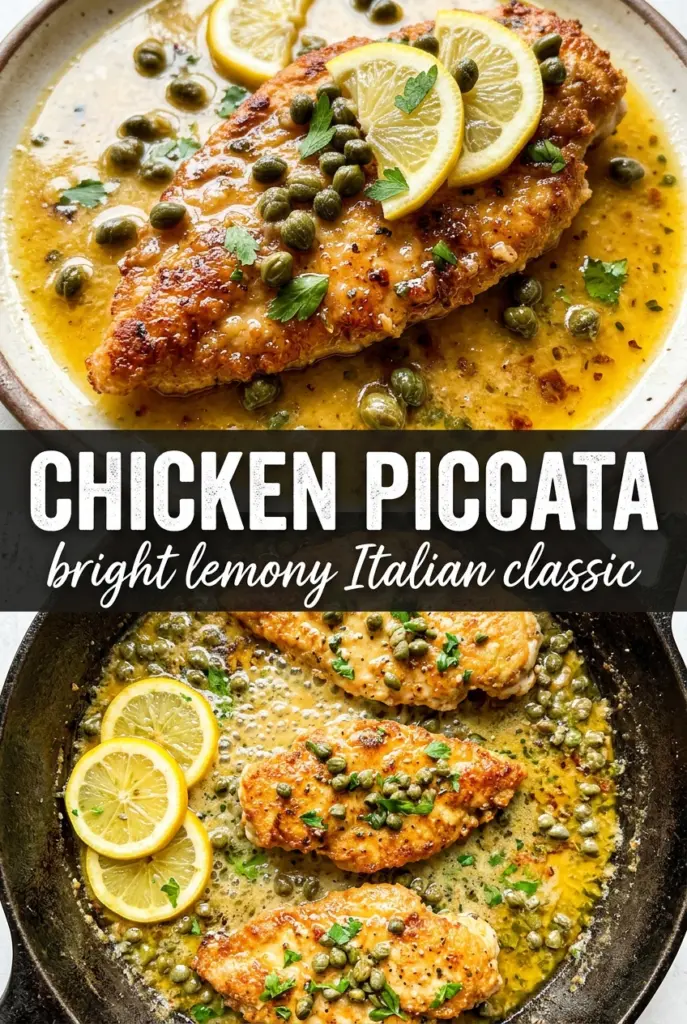
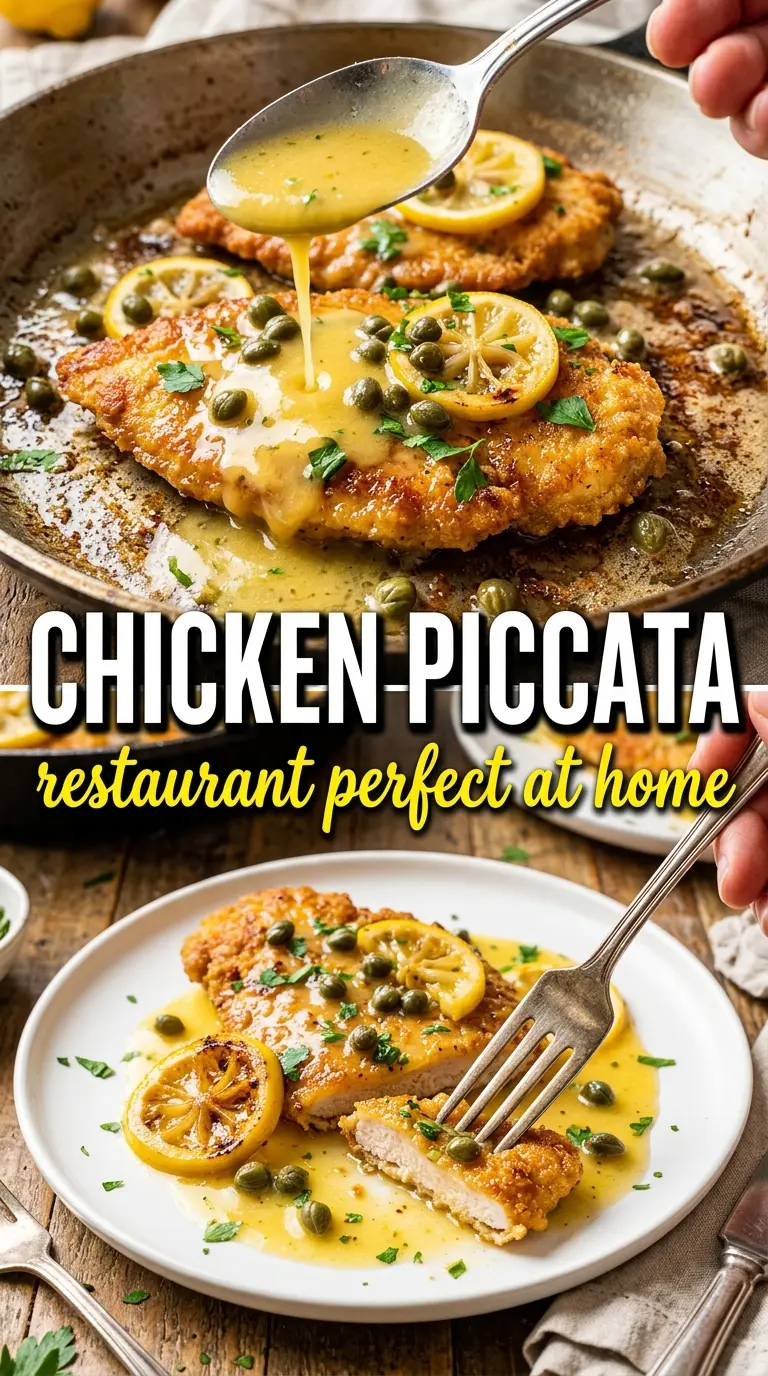
Golden chicken cutlets swimming in a sharp, glossy lemon-butter-caper sauce never stay on the table for long. The chicken stays crisp at the edges, the sauce clings without turning heavy, and every bite hits that balance of bright, salty, and rich that makes chicken piccata worth keeping in regular rotation.
What makes this version work is the order of operations. The chicken gets a light flour coating, which gives you color in the pan and helps the sauce grab onto the cutlets later. Then the sauce starts with the browned bits left behind after frying the chicken, so the lemon, wine, and broth pick up real depth instead of tasting flat. The final swirl of cold butter off the heat matters too. That’s what turns the sauce from thin and sharp into something silky enough to spoon over the top.
If you’ve ever had piccata that tasted watery, overly tart, or greasy, the details below will help with that. The sauce needs a quick reduction, not a long boil, and the butter goes in at the end, not at the start. That small difference is what keeps the pan sauce smooth.
The sauce thickened into a silky glaze and the lemon stayed bright instead of bitter. I served it over linguine and my husband asked if I could put this in the weekly dinner rotation.
Save this chicken piccata for the nights when you want crisp cutlets and a bright lemon-caper pan sauce without a lot of fuss.
The Secret to Piccata That Stays Bright Instead of Thin and Watery
The biggest mistake with chicken piccata is treating the sauce like a long simmer. Lemon juice is sharp, but it also gets harsh if you boil it down too hard. That’s why this version reduces the broth and wine just enough to concentrate the flavor, then finishes with butter off the heat so the sauce turns glossy instead of broken.
The other place people lose the plot is the chicken. Thick breasts cook unevenly, which means you end up with pale spots, overcooked edges, and a sauce that’s waiting on the meat. Halving the breasts into thin cutlets fixes that problem fast. They brown quickly, stay tender, and give you more surface area for the sauce to cling to.
- Thin cutlets — These cook fast and evenly. If your chicken breasts are large, slice them horizontally before pounding lightly to an even thickness.
- Flour — The light dredge gives the chicken its golden crust and helps the sauce thicken slightly in the pan. Don’t coat heavily or the sauce will turn pasty.
- Dry white wine — This adds depth and acidity that plain broth can’t fully replace. Use something you’d drink, like Pinot Grigio or Sauvignon Blanc.
- Capers and lemon — Together they give piccata its signature salty-bright punch. Rinse the capers only if yours are extremely briny; otherwise, just drain them well.
- Cold butter at the end — This is what smooths the sauce and gives it that silky finish. Add it after removing the pan from the heat so it emulsifies instead of separating.
What Each Ingredient Is Actually Doing in This Chicken
- Chicken (the protein star) — Pat dry so it browns instead of steams. Room temperature cooks more evenly.
- Oil or butter (the browning medium) — High-heat oil is essential. Creates flavor through browning.
- Seasonings (salt, pepper, spices, herbs) — Don’t hold back. Chicken carries the entire flavor profile.
- Aromatics (garlic, ginger, onion) — Cook with fat to bloom flavors. They become the foundation.
- Sauce or liquid (the moisture keeper) — This prevents dryness and adds flavor. Balance richness with acid.
- Acid (lemon, vinegar, wine, or tomato) — This brightens and prevents one-dimensional flavor.
- Optional vegetables — Layer by cooking time so everything finishes together.
- Proper doneness (165°F internal temperature) — Use a thermometer for accuracy. Overcooked is dry.
Building the Sauce in the Same Pan You Cook the Chicken In
Seasoning and Dredging the Cutlets
Season the chicken cutlets with salt and pepper, then drag each piece lightly through the flour and shake off the excess. You want a dusting, not a thick coat. Too much flour makes the pan sauce cloudy and can leave a gummy layer on the chicken. Set the cutlets aside for a minute so the flour hydrates slightly before it hits the pan.
Getting a Deep Golden Sear
Heat the olive oil and butter over medium-high until the butter foams, then lay the chicken in without crowding the skillet. If the pan is packed, the cutlets steam instead of browning. Cook until the first side turns a deep golden color and releases easily, then flip and finish the second side. Pull the chicken when it’s cooked through and just tender; overcooking makes the cutlets dry before the sauce even goes on.
Turning the Brown Bits Into Sauce
Add the garlic and stir for about 30 seconds, just until fragrant. Then pour in the wine and scrape the pan hard with a wooden spoon; those browned bits are the backbone of the sauce. Let the wine simmer for a couple of minutes so the raw alcohol cooks off, then add the broth, lemon juice, capers, and lemon slices. The sauce should bubble steadily and reduce by about a third, not turn syrupy.
The Butter Finish That Makes It Glossy
Take the skillet off the heat before adding the last butter. Swirl it in gently until the sauce turns smooth and shiny. If the pan is still screaming hot, the butter can split and look greasy instead of silky. Return the chicken to the pan, spoon the sauce over the top, and finish with parsley so the dish tastes fresh, not heavy.
Three Practical Ways to Adapt Chicken Piccata
Gluten-Free Piccata
Swap the all-purpose flour for a 1:1 gluten-free flour blend or use a light dusting of cornstarch. Cornstarch gives you a slightly cleaner crust and a thinner sauce, while a blend behaves more like the original and keeps the pan drippings from looking murky.
Dairy-Free Version
Use all olive oil instead of butter for the sear, then finish the sauce with a dairy-free butter substitute that melts smoothly. You’ll lose a little of the classic buttery roundness, but the sauce will still be bright and glossy if you keep the heat low at the end.
No-Wine Substitution
If you don’t cook with wine, replace it with extra chicken broth plus 1 to 2 teaspoons of white wine vinegar. That won’t taste exactly the same, but it still gives the sauce the acidity it needs to keep the butter from feeling flat.
Make It Ahead and Reheat Cleanly
Cook the chicken and sauce separately if you’re serving later, then combine them right before eating. That keeps the cutlets from going soft in the sauce and gives you a fresher finish when you rewarm everything together.
Storage and Reheating
- Refrigerator: Store leftovers in an airtight container for up to 3 days. The chicken softens a bit in the sauce, but the flavor holds up well.
- Freezer: Freeze the cooked chicken and sauce for up to 2 months, though the sauce may lose some of its silky texture after thawing. Thaw overnight in the refrigerator before reheating.
- Reheating: Warm gently in a skillet over low heat with a splash of broth or water. Don’t boil it, or the sauce can separate and the chicken will dry out.
Answers to the Questions Worth Asking

Chicken Piccata
Ingredients
Equipment
Method
- Season the chicken cutlets with salt and pepper, then dredge lightly in flour and shake off excess flour.
- Heat the olive oil and 2 tablespoons butter in a large skillet over medium-high heat, then cook chicken in batches for 3-4 minutes per side until golden and cooked through; remove and set aside.
- Add garlic and cook for 30 seconds, then pour in the white wine and scrape up browned bits.
- Simmer the wine mixture for 2 minutes.
- Add the chicken broth, lemon juice, capers, and lemon slices, then simmer for 4-5 minutes until the sauce reduces by a third.
- Turn off the heat and swirl in the remaining 2 tablespoons cold butter until the sauce is glossy.
- Return the chicken to the skillet, spoon sauce over each cutlet, and garnish with fresh parsley.