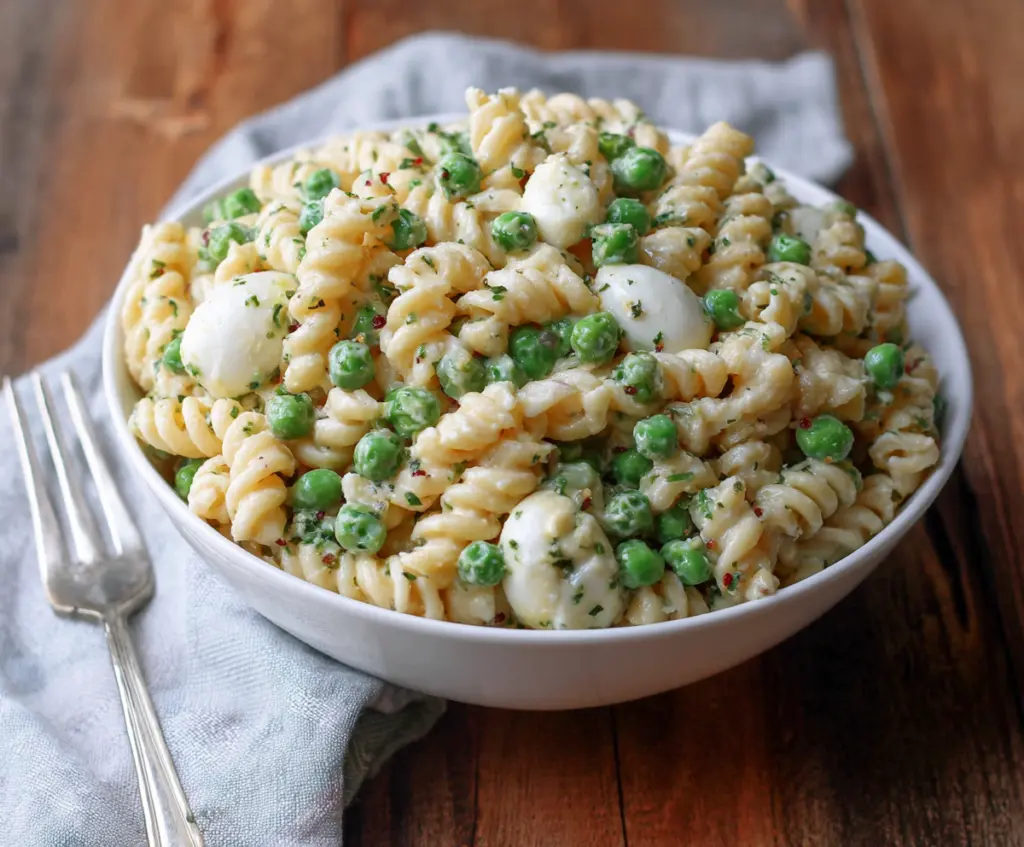
This English Pea Pasta Salad is a bright and fresh dish that combines tender pasta with sweet peas and crunchy vegetables. It’s tossed in a light dressing, making it a perfect side or light meal!
Every bite is like a little party of colors and flavors! I love how quick it is to whip up, and it’s a great way to sneak in those veggies. Don’t be surprised if you find yourself going back for seconds! 😄
Key Ingredients & Substitutions
Rotini Pasta: This spiral-shaped pasta is great for holding dressings and toppings. You can easily swap it for other pastas like fusilli or farfalle if that’s what you have on hand. Gluten-free pasta works too if needed!
English Peas: Fresh or frozen peas add sweetness and color. If peas aren’t available, chopped green beans or edamame can be good substitutes. Canned peas can work too, though they will be a bit softer.
Mozzarella Balls: The small fresh mozzarella (bocconcini) gives a lovely creaminess. If unavailable, try cubed mozzarella or even crumbled feta for a different flavor twist. Just keep in mind that feta will change the dish’s profile a bit.
Herbs: Fresh parsley brightens up the salad. If you don’t have parsley, swap it for fresh basil or dill, depending on your flavor preference!
Mayonnaise & Sour Cream: This creamy base makes the salad rich and tasty. If you want a lighter version, swap out half of the mayo for Greek yogurt or try a mayo substitute like avocado or a dairy-free option.
How Do I Get the Pasta and Peas Perfectly Cooked?
Cooking pasta and peas to the right texture is key for this salad. Here’s how to do it:
- Start with a large pot of salted boiling water. This helps the pasta stay flavorful.
- Add the rotini and cook until al dente, usually a couple of minutes less than the package directions suggest.
- A few minutes before it’s done, toss in the English peas to blanch them. Remember, if using frozen peas, only blanch for 1-2 minutes; fresh peas need 2-3 minutes.
- Once done, drain them in a colander and immediately rinse with cold water to stop cooking. This keeps everything bright and fresh.
By following these steps, you’ll ensure your pasta salad has the perfect bite and fresh flavors!

How to Make English Pea Pasta Salad
Ingredients You’ll Need:
For the Pasta Salad:
- 12 oz rotini pasta (or any spiral-shaped pasta)
- 1 1/2 cups fresh or frozen English peas
- 1 cup small fresh mozzarella balls (bocconcini)
- 1/4 cup fresh parsley, finely chopped
For the Dressing:
- 1/4 cup mayonnaise
- 2 tablespoons sour cream or Greek yogurt
- 1 tablespoon lemon juice
- 1 teaspoon Dijon mustard
- 1/2 teaspoon garlic powder
- 1/2 teaspoon onion powder
- Salt and freshly ground black pepper, to taste
- Optional: pinch of red pepper flakes for mild heat
How Much Time Will You Need?
This English Pea Pasta Salad will take about 15 minutes to prepare and an additional 30 minutes to chill in the fridge, making a total of about 45 minutes before you can serve it. Perfect for a light side dish or a refreshing main course!
Step-by-Step Instructions:
1. Cooking the Pasta:
Start by bringing a large pot of salted water to a boil. Once boiling, add the rotini pasta and cook according to the package instructions until al dente, which usually takes about 8-10 minutes. Remember to give it a stir occasionally to prevent sticking.
2. Blanching the Peas:
When there are just 2-3 minutes left of cooking time for the pasta, add the fresh or frozen peas to the pot. This step blanches the peas, making them bright green and tender. If you are using frozen peas, just blanch for 1-2 minutes; for fresh peas, go for 2-3 minutes.
3. Cooling Down:
After cooking, drain the pasta and peas in a colander. Rinse them with cold water to stop the cooking process and cool them down completely. Make sure to let them drain thoroughly before moving on to the next step.
4. Making the Dressing:
In a large mixing bowl, whisk together the mayonnaise, sour cream (or Greek yogurt), lemon juice, Dijon mustard, garlic powder, onion powder, salt, and pepper. Keep whisking until everything is smooth and well combined. It should be creamy and flavorful!
5. Combining Everything:
Gently add the cooled pasta and peas to the dressing mixture. Toss everything together carefully to ensure all the pasta and peas are coated evenly with the dressing.
6. Adding the Cheese and Herbs:
Now, fold in the fresh mozzarella balls and chopped parsley. Be gentle while folding to avoid breaking the mozzarella balls.
7. Taste and Adjust:
Take a moment to taste your salad! Adjust the seasoning with more salt, pepper, or lemon juice according to your preferences. If you like a bit of heat, sprinkle in a pinch of red pepper flakes.
8. Chilling Time:
Cover the bowl and refrigerate the salad for at least 30 minutes. This chilling period allows all those wonderful flavors to meld together nicely.
9. Serving:
Once chilled, you can serve the salad either cold or at room temperature. It makes for a delightful side dish or a light main course. Enjoy your fresh and tasty English Pea Pasta Salad!
Can I Use Different Types of Pasta?
Absolutely! While rotini is ideal for this salad, you can substitute it with any spiral-shaped pasta like fusilli or farfalle. Even gluten-free pasta works well if that’s your preference.
How Do I Preserve Leftovers?
To store leftovers, place them in an airtight container and store them in the fridge for up to 3 days. Just give them a gentle stir before serving since the dressing may thicken upon chilling.
Can I Make This Salad Vegan?
Yes, you can! Substitute the mayonnaise with a vegan mayo or avocado, and replace the mozzarella with vegan cheese or omit it entirely. You can also enhance the flavor with nutritional yeast.
How Long Should I Chill the Salad?
It’s best to chill the salad for at least 30 minutes, allowing the flavors to meld beautifully. However, if you’re short on time, you can serve it right away, but it tastes even better after a bit of chilling!