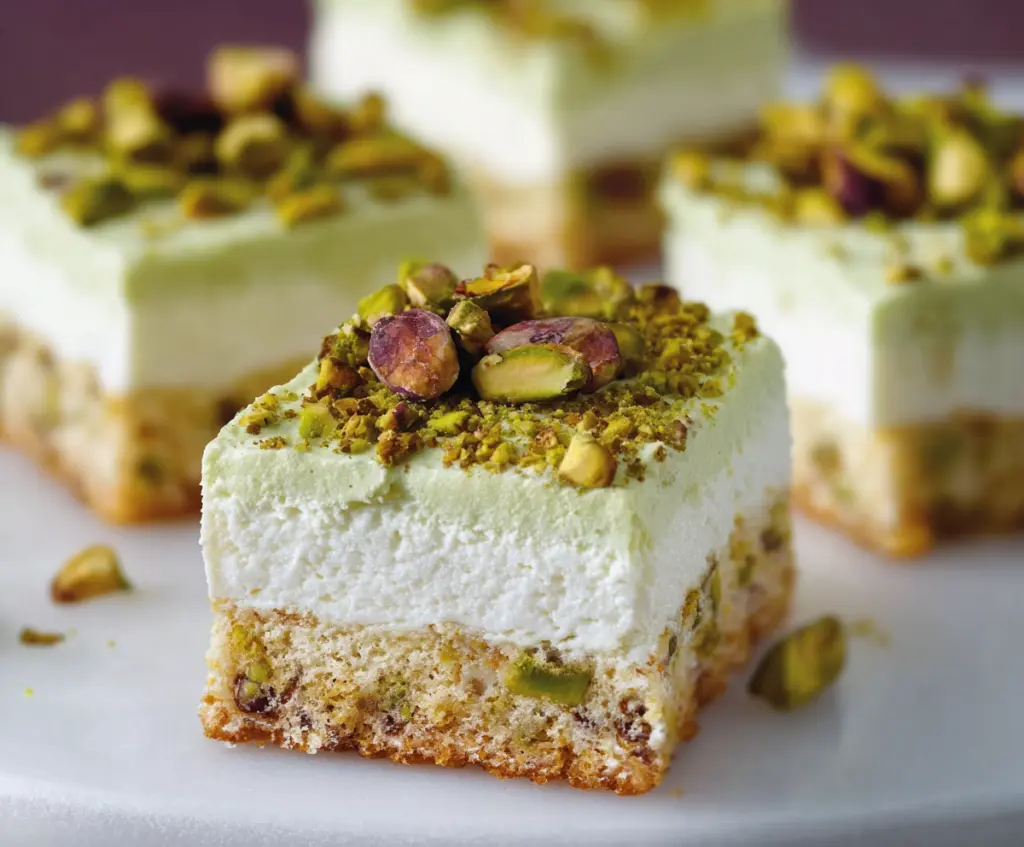
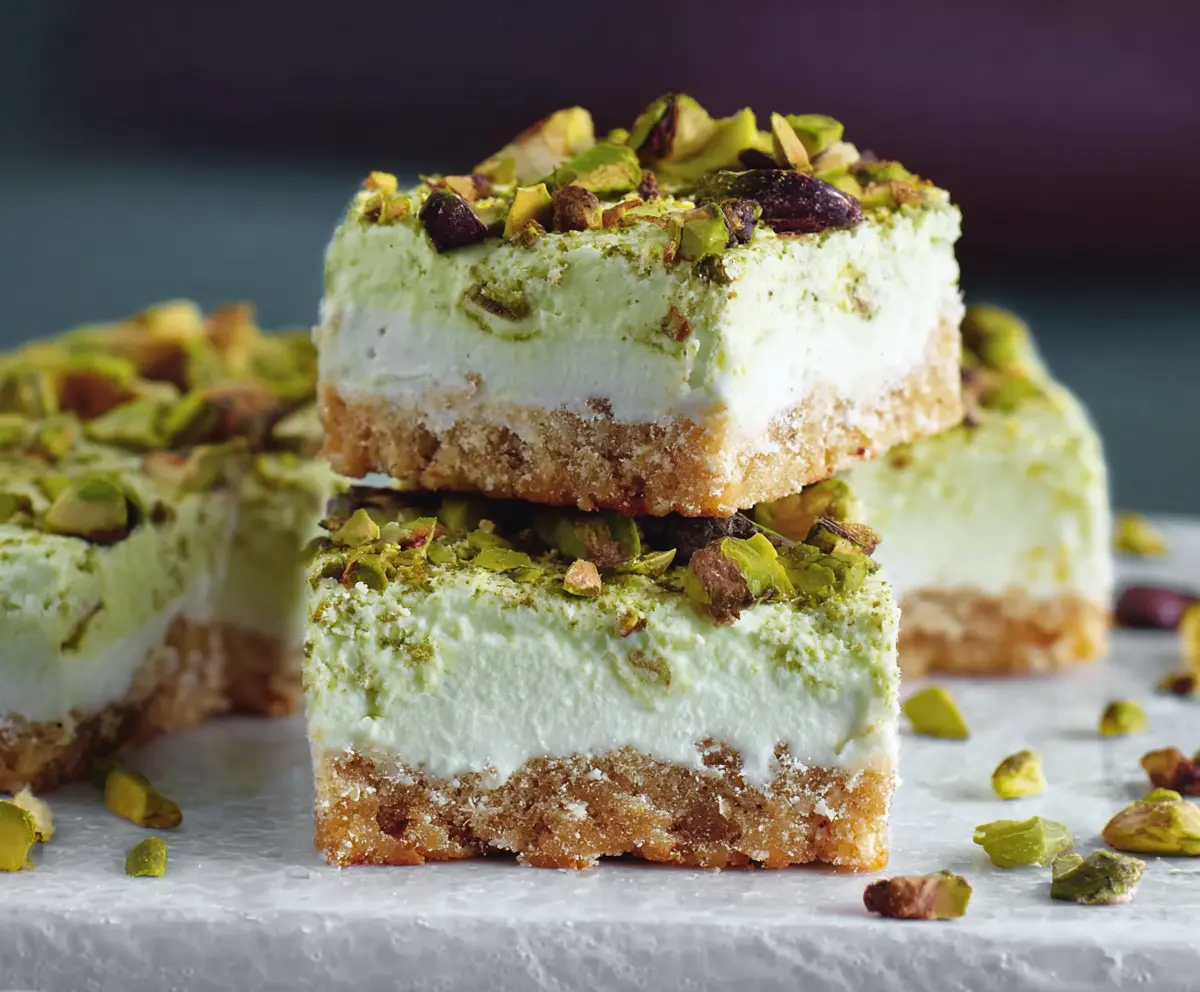
These Pistachio Cream Bars are a tasty treat that brings a pop of green goodness! With a creamy pistachio filling and a crumbly base, they’re perfect for a sweet snack or dessert.
Making these bars is super simple! Just mix, pour, and chill. I love cutting them into squares—it makes sharing way easier (or sneaking a few for myself! 😄)
Key Ingredients & Substitutions
Pistachios: These nuts bring both flavor and texture. If you can’t find them, almonds or walnuts can work in their place, but they will change the taste a bit. Toasting the nuts before using them can enhance their flavor.
Cream Cheese: This adds a rich, creamy layer. If you’re looking for a lighter option, consider using Neufchâtel cheese, which has less fat but a similar taste. For dairy-free, there are plant-based cream cheese options available.
Heavy Cream: It’s essential for creating that light and fluffy layer. If you need a lighter version, you can use half-and-half, though the bars will be less rich. Coconut cream is a great dairy-free alternative and adds a nice flavor.
All-Purpose Flour: For a gluten-free option, try almond flour or gluten-free all-purpose flour. This will change the texture slightly but still works well in the crust!
Powdered Sugar: It gives sweetness without the graininess. If you prefer natural sweeteners, powdered erythritol or coconut sugar can be good substitutes.
How Do I Achieve the Perfect Whipped Cream?
Whipping cream sounds simple, but there are a few tips to make sure it turns out perfectly smooth and fluffy. Start with cold heavy cream—it whips best when chilled. Use a clean bowl and beaters to avoid any greasy residue.
- Pour chilled heavy cream into your mixing bowl.
- Whip on medium speed until you see soft peaks forming.
- Once soft peaks form, increase the speed and continue until stiff peaks appear.
- Be careful not to over-whip, or you’ll end up with butter!
How to Make Pistachio Cream Bars
Ingredients You’ll Need:
For the Crust:
- 1 cup all-purpose flour
- 1/2 cup finely chopped pistachios
- 1/3 cup granulated sugar
- 1/4 teaspoon salt
- 1/2 cup unsalted butter, melted
For the Cream Layer:
- 1 cup heavy whipping cream
- 8 oz cream cheese, softened
- 1/2 cup powdered sugar
- 1 teaspoon vanilla extract
- 1/4 cup finely ground pistachio powder (for flavor and color)
For the Topping:
- 1/4 cup coarsely chopped pistachios
How Much Time Will You Need?
This recipe will take about 15 minutes to prepare the crust and cream layer and then an additional 4 hours to chill in the refrigerator. For the best results, it’s best to let the bars set overnight!
Step-by-Step Instructions:
1. Preheat and Prepare the Pan:
First, preheat your oven to 350°F (175°C). While the oven is heating, take an 8×8 inch square baking pan and line it with parchment paper. Make sure to leave some overhang on the sides so you can easily lift the bars out later. This little step makes a big difference!
2. Make the Crust:
In a mixing bowl, combine the flour, finely chopped pistachios, sugar, and salt. Mix them together gently. Next, pour in the melted butter and stir everything together until the mixture looks like coarse crumbs. This will be the base of your delicious bars!
3. Bake the Crust:
Now, press the mixture firmly and evenly into the bottom of your prepared pan. Pop it in the oven and bake for about 15 minutes, or until it’s golden and set. Once done, take it out and let it cool completely. This allows the crust to become firm and ready for the creamy layer!
4. Prepare the Cream Layer:
In a large bowl, beat the softened cream cheese using a mixer until it’s smooth. Then, add the powdered sugar, vanilla extract, and finely ground pistachio powder. Mix well until everything is fully combined and creamy. This is where the magic happens!
5. Whip the Cream:
In a separate bowl, whip the heavy cream until it forms stiff peaks. This means it should hold its shape when you lift the beaters out. Be careful not to over-whip, or it might turn into butter!
6. Combine the Mixtures:
Gently fold the whipped cream into the cream cheese mixture. Do this slowly so you don’t lose all that airiness from the whipped cream. Keep folding until everything is completely combined and smooth.
7. Assemble the Bars:
Spread the creamy pistachio mixture evenly over the cooled crust layer, smoothing it out with a spatula. It should cover the crust nicely!
8. Add the Topping:
Sprinkle the coarsely chopped pistachios generously over the cream layer for a delightful crunch and visual appeal. This will add an extra pop of pistachio flavor!
9. Chill the Bars:
Cover the pan with plastic wrap or foil and refrigerate the bars for at least 4 hours, but overnight is even better! This chilling time helps the cream layer to set up nicely.
10. Serve and Enjoy:
Once they are set, grab the edges of the parchment paper to lift the bars out of the pan. Cut them into squares and serve chilled. Enjoy your rich and creamy Pistachio Cream Bars!
Can I Use Different Nuts for the Crust or Topping?
Absolutely! If you’re not a fan of pistachios, you can substitute with finely chopped almonds or walnuts for the crust. For the topping, any nut you like will work, but keep in mind that it will slightly change the flavor profile.
What Can I Substitute for Heavy Whipping Cream?
If you need a lighter alternative, half-and-half works, but the bars will be less rich. For a non-dairy option, coconut cream is a fantastic substitute that will still provide a creamy texture and a hint of coconut flavor!
How Should I Store Leftover Pistachio Cream Bars?
Store any leftovers in an airtight container in the refrigerator for up to 5 days. Make sure to keep them chilled, as they taste best served cold!
Can I Prepare These Bars in Advance?
Yes, these bars are perfect for making ahead of time! You can prepare them a day or two in advance and keep them refrigerated until you’re ready to serve. Just ensure they are properly chilled to set the cream layer.