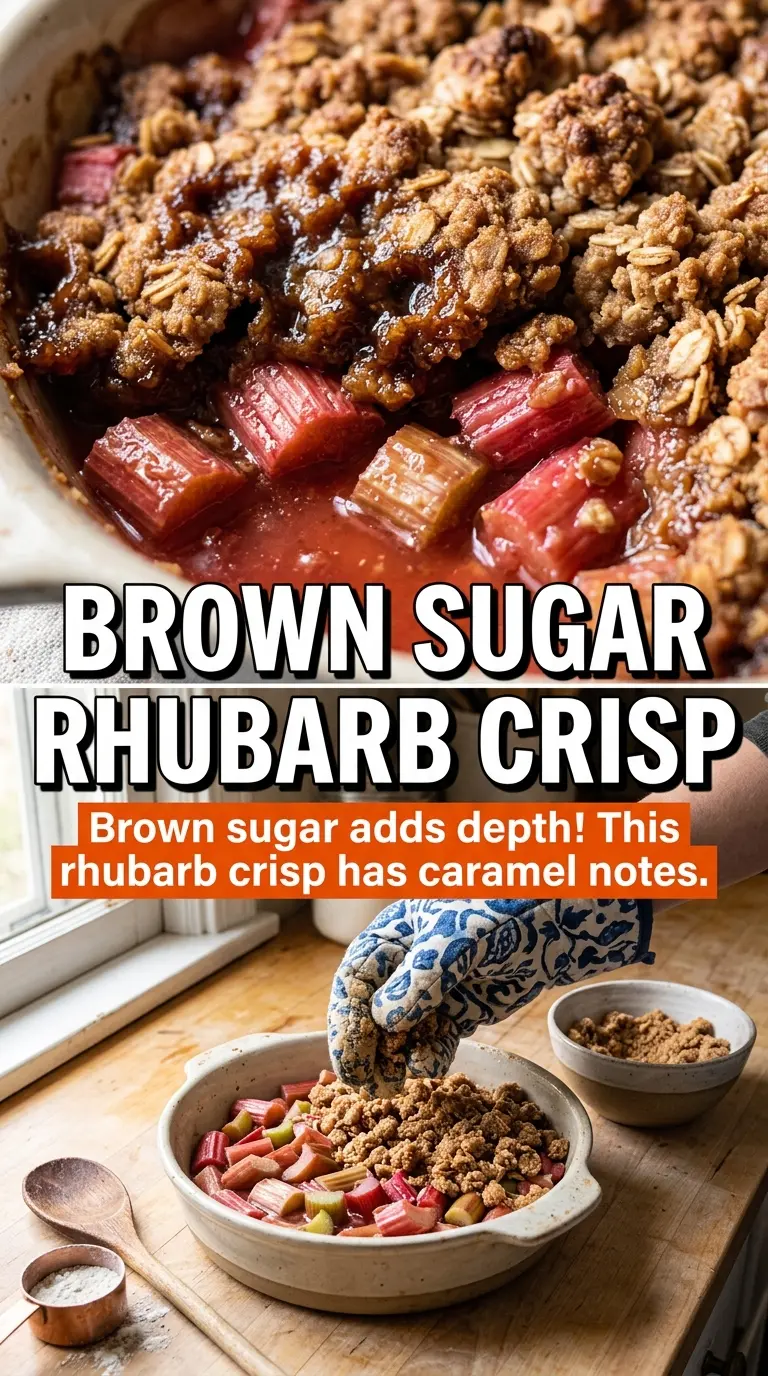
Tender rhubarb tucked under a thick oat-and-brown-sugar crumble is the kind of dessert that disappears fast, especially when the filling turns glossy and just syrupy enough to hold its shape on the spoon. The contrast matters here: tart fruit, a little orange zest for lift, and a topping that bakes into big golden crags instead of fine sandy crumbs. That texture is what keeps this from tasting flat.
The filling is simple on purpose. Rhubarb brings plenty of sharpness, so the sugar and a small amount of flour are there to soften the bite and thicken the juices without making the fruit pasty. The topping stays crisp because the butter goes in cold; once it melts in the oven, it leaves pockets and ridges that brown before the fruit underneath has a chance to overcook.
Below, I’ll show you the small details that matter most: how to keep the topping crumbly, how to know when the filling has baked long enough, and the one cooling step that helps the crisp serve in clean spoonfuls instead of turning into a runny pan of fruit.
The rhubarb baked down into a thick, jammy layer and the oat topping stayed crisp even after sitting on the counter for a bit. I loved the orange zest in the filling — it kept the dessert from tasting too sweet.
Rhubarb Crisp with that golden oat topping belongs in your spring dessert rotation.
The Trick to Keeping Rhubarb Crisp, Not Watery
Rhubarb gives up a lot of juice as it bakes, and that’s where many crisps go wrong. If the fruit is piled in with no thickener, the bottom turns soupy and the topping loses its crunch before the center has finished bubbling. The small amount of flour in the filling catches that liquid and turns it into a lightly thickened syrup instead of a thin puddle.
The other mistake is cutting the rhubarb too small. Bigger 1-inch pieces hold their shape better, so you still get distinct bites of fruit after baking. You want the filling bubbling through the topping before you pull it from the oven; that bubbling tells you the juices have thickened enough to set as the crisp cools.
What the Rhubarb, Orange Zest, and Cold Butter Are Doing
- Fresh rhubarb — Fresh stalks hold their shape and give the dessert its sharp, clean bite. Frozen rhubarb can work, but don’t thaw it first; it releases too much liquid and makes the filling harder to thicken.
- Orange zest — This is a small addition that wakes up the whole pan. It doesn’t make the crisp taste orangey; it just rounds out rhubarb’s tart edge and keeps the filling from tasting one-note.
- Old-fashioned oats — Use rolled oats, not quick oats. Quick oats soak up too much moisture and bake into a denser, softer topping instead of those craggy clusters that stay crisp.
- Cold butter — Cold cubes are what give you a proper crumble. If the butter starts softening before it hits the oven, the topping turns paste-like instead of sandy and pebbly.
Building the Crumble So It Bakes Into Big Golden Clusters
Mix the fruit before the topping
Stir the rhubarb with the sugar, flour, and orange zest until every piece looks lightly coated, then spread it in the buttered dish. The flour needs to touch the fruit before baking or it won’t thicken evenly. If you see dry pockets of flour at the bottom, keep stirring; those spots can turn gummy once the juices hit them.
Cut the butter into the dry ingredients
Work the cold butter into the oats, flour, brown sugar, cinnamon, and salt until the mixture looks like coarse crumbs with some pea-sized bits still visible. Those larger pieces melt into crisp, uneven clusters in the oven. If you rub everything too fine, the topping bakes up more like a soft streusel than a proper crisp.
Bake until the center is bubbling
Spread the topping evenly over the fruit and bake at 375°F until the top is deep golden and the filling is actively bubbling through the edges and center, usually 40 to 45 minutes. The bubbles are the cue that the fruit has thickened enough. If the top browns before the filling bubbles, lay a loose piece of foil over the dish for the last few minutes and keep baking.
Let it rest before serving
The crisp needs about 15 minutes to settle after it comes out of the oven. Right away, the juices are loose and run everywhere. A short rest gives the filling time to thicken into spoonable layers, which is exactly what you want if you’re serving it with ice cream.
How to Adapt This for Different Pans and Preferences
Make it gluten-free with a flour blend
Swap the all-purpose flour in both the filling and topping for a 1:1 gluten-free baking blend. The texture stays close to the original, but the topping may be a little more delicate, so let the crisp cool before scooping. Oats are naturally gluten-free, but use certified gluten-free oats if cross-contamination matters.
Use strawberries for a softer, sweeter filling
Replace up to half of the rhubarb with sliced strawberries for a gentler tartness and a more jammy finish. Strawberries release more liquid as they bake, so the filling will be looser and a little sweeter; the extra flour in the recipe helps, but don’t go beyond half unless you want a much softer set.
Make it dairy-free with plant butter
Use a solid dairy-free butter substitute that’s meant for baking, not a soft spread. The topping won’t brown quite as deeply, but it will still clump and crisp if the substitute stays cold. If the mixture looks greasy before baking, chill it for 10 minutes so the crumb holds together better in the oven.
Bake it in smaller dishes for cleaner portions
Divide the filling and topping between smaller baking dishes or ramekins for individual servings. The bake time will be shorter, and you’ll want to watch for bubbling edges and a golden top instead of relying only on the clock. This is the best move if you want crisp topping on every serving and less of the soft center that can happen in a deep dish.
Storage and Reheating
- Refrigerator: Store covered for up to 4 days. The topping softens a bit after the first day, but the flavor stays good.
- Freezer: Freeze baked crisp in a tightly wrapped dish for up to 2 months. Thaw overnight in the fridge before reheating so the center warms evenly.
- Reheating: Warm uncovered in a 350°F oven until the filling is hot and the topping crisps back up, usually 15 to 20 minutes. The microwave will heat the fruit, but it softens the crumble, so use the oven if you want that texture back.
Questions I Get Asked About This Recipe

Rhubarb Crisp
Ingredients
Equipment
Method
- Preheat the oven to 375°F and butter a 9x13-inch baking dish.
- Spread the buttered baking dish on the counter so it’s ready for the filling.
- Combine the fresh rhubarb, sugar, all-purpose flour, and orange zest, then stir until evenly coated.
- Spread the rhubarb mixture into the prepared baking dish in an even layer.
- Mix old-fashioned oats, all-purpose flour, brown sugar, cinnamon, and salt in a bowl.
- Cut in the cold butter until the mixture resembles coarse crumbs, with no large wet clumps.
- Spread the topping evenly over the rhubarb mixture so it covers completely.
- Bake at 375°F for 40-45 minutes, until the topping is golden brown and the filling is bubbling around the edges.
- Let the crisp sit in the oven for 2 minutes after baking to firm the topping slightly.
- Cool the crisp for 15 minutes before serving so the syrup thickens.
- Serve warm with vanilla ice cream or whipped cream.