Strawberry rhubarb pie earns its place because the filling doesn’t just taste bright, it cuts cleanly after cooling and still keeps that jammy, spoonable center people hope for when they slice into it. The best versions balance the tart edge of rhubarb with strawberries that stay fruity instead of turning mushy, all tucked under a crust that stays crisp at the bottom instead of soggy from the juices.
This version leans on a short rest before baking so the sugar starts drawing out the fruit juices, which gives the cornstarch something to thicken before the pie goes into the oven. That small pause helps the filling set instead of leaking all over the pan. A little vanilla rounds out the fruit without making it taste bakery-sweet, and the butter dots melt into the filling for a richer finish.
Below, I’ve included the detail that matters most for this pie: how to keep the filling thick enough to slice, plus the small crust choices that make the difference between a neat wedge and a runny mess.
The filling set up beautifully after the full cool time, and the crust stayed flaky instead of getting soggy under all that fruit juice. I also liked that the vanilla softened the tartness without making it taste too sweet.
Like this strawberry rhubarb pie? Save it to Pinterest for the flaky crust and jewel-toned filling that slice clean after a proper cool.
The Filling Needs Time to Set Before It Goes Anywhere Near the Oven
Rhubarb and strawberries release a lot of juice as soon as the sugar hits them. That’s not a problem here; it’s the point. The short rest gives the cornstarch a head start so it can thicken the juices as the pie bakes, instead of trying to do all the work at the very end when the fruit is already boiling hard.
If you skip that rest, the filling can flood the bottom crust and bake up loose, even if the top looks perfect. The other trap is underbaking. Strawberry rhubarb pie should be visibly bubbling in the center, not just around the edges, because that bubbling is the sign the starch has fully activated.
- The fruit mixture — Letting it sit with the sugar, cornstarch, salt, and vanilla changes the filling from watery to spoonable. That pause is more important than it looks.
- The cornstarch — It gives this pie its clean slice. Flour can work in a pinch, but the filling will look cloudier and needs a little more baking time to lose its raw taste.
- The bottom crust — A cold crust goes into the oven better and holds up longer against the juices. If it starts warm, the fat melts too soon and the base turns softer.
What the Fruit, Thickener, and Crust Each Have to Do Here
- Rhubarb — Use fresh, firm stalks cut into even 1/2-inch pieces so they soften at the same rate. Thicker pieces can stay a little tough while the rest of the filling is already done.
- Strawberries — Fresh berries hold their shape better than frozen in this pie. Frozen berries add extra water, which means a looser filling and a longer bake.
- Cornstarch — This is what makes the pie set once it cools. If you swap in flour, use a little more and expect a softer, less glossy filling.
- Butter — Those small dots melt into the filling and add richness where the fruit is sharpest. You’ll taste the difference more in the first bite than in the whole pie.
- Egg wash and sugar — The egg gives the top crust color and shine, and the sugar adds that crisp, sparkling finish that makes a homemade pie look finished.
Building the Pie So the Bottom Stays Crisp and the Top Browns Evenly
Preparing the Fruit
Mix the rhubarb, strawberries, sugar, cornstarch, salt, and vanilla in a large bowl until every piece is coated. After 10 minutes, you should see a glossy pool of juice at the bottom of the bowl. That’s the sign the filling is ready for the crust. If it looks dry, it hasn’t rested long enough.
Filling and Sealing
Pour the fruit into the lined pie plate and dot the top with butter before adding the second crust. Trim the edges, crimp them well, and cut vents that are large enough for steam to escape. Tight, tiny slits can trap steam and push the filling out the seams instead of letting it bake evenly.
Baking in Two Temperatures
Start hot at 400°F for 20 minutes to set the crust fast and give the filling a strong initial burst of heat. Then lower the oven to 350°F and bake until the pie is deeply golden and the fruit is bubbling through the vents, usually another 35 to 40 minutes. If the edges brown too quickly, cover them with foil, but don’t pull the pie too early just because the top looks done.
The Long Cool
This is the part people rush, and it’s the reason a beautiful pie turns sloppy on the plate. Let it cool completely for at least 4 hours so the filling firms up and cuts cleanly. If you slice it warm, the juices will run before the starch has finished setting.
How to Adapt This Pie When You Need a Different Crust, Sweetness, or Baking Plan
Gluten-Free Version
Use a gluten-free pie crust that bakes firmly enough to handle a juicy filling. The fruit mixture itself is already gluten-free, so the main difference is crust texture: you want one that can stand up to the filling without crumbling when you slice it.
Less Sweet Filling
Drop the sugar slightly if your strawberries are peak-ripe and very sweet, but don’t cut it too far. Sugar does more than sweeten here; it helps draw out juice and supports the thickening process, so cutting it too much can leave you with a looser pie.
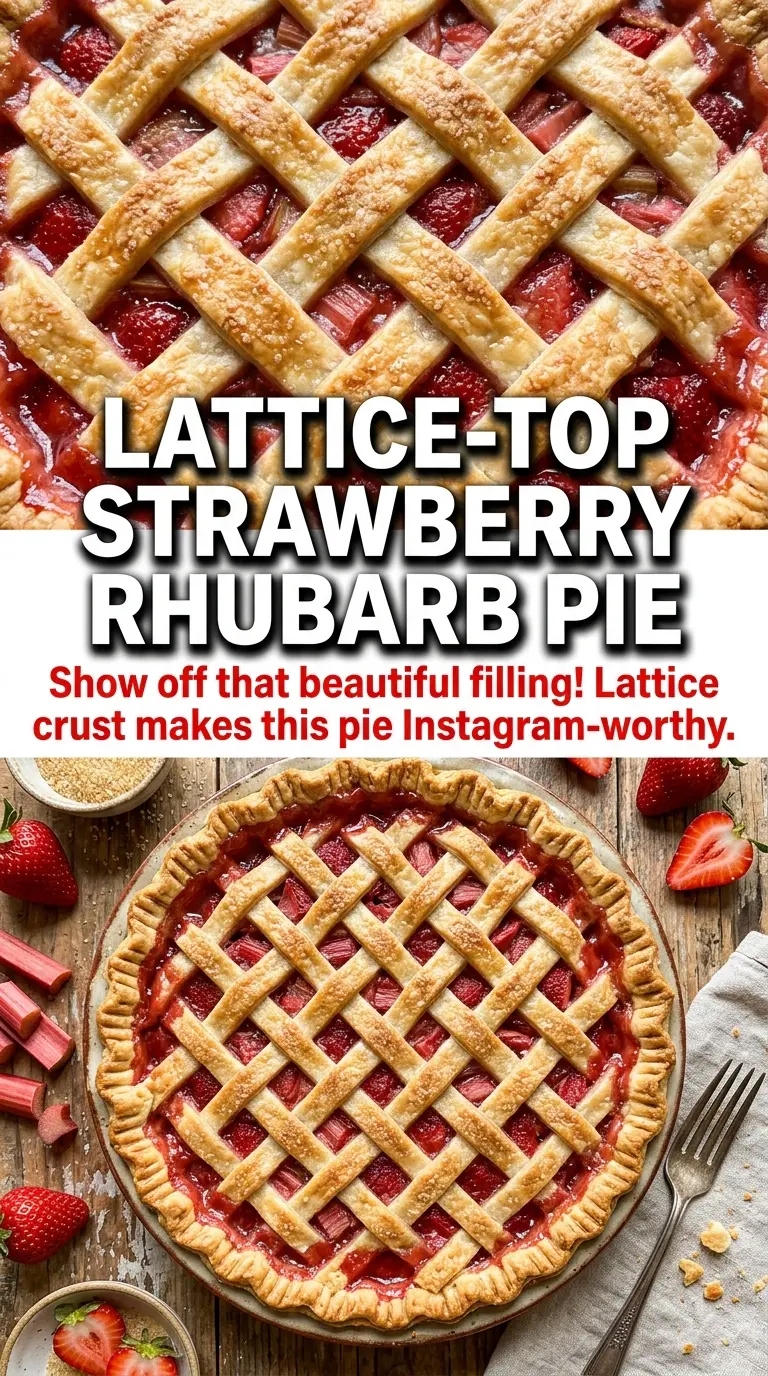
Lattice Top Instead of a Full Crust
A lattice gives the filling more places to vent, which can help the center cook down a little more evenly. It also lets the fruit color show through, which is half the appeal of strawberry rhubarb pie in the first place.
Make-Ahead Baking
You can assemble the pie and refrigerate it before baking, but keep it covered and bake it cold from the fridge. A chilled pie holds its shape better, and the crust is less likely to slump while the oven heat sets it.
Storage and Reheating
- Refrigerator: Store covered for up to 4 days. The crust softens a bit, but the filling stays nicely sliceable.
- Freezer: Baked pie freezes well. Cool completely, wrap tightly, and freeze for up to 2 months. Thaw overnight in the fridge before reheating.
- Reheating: Warm slices in a 300°F oven until the crust crisps back up and the filling loosens slightly, about 10 to 15 minutes. The microwave makes the crust soft, so use it only if texture doesn’t matter.
Answers to the Questions Worth Asking

Strawberry Rhubarb Pie
Ingredients
Equipment
Method
- Preheat the oven to 400°F and line a 9-inch pie plate with the bottom crust.
- Combine rhubarb, strawberries, sugar, cornstarch, salt, and vanilla extract in a large bowl.
- Let the fruit mixture sit for 10 minutes to start thickening.
- Pour the fruit mixture into the lined pie crust, then dot with the butter.
- Top with the second pie crust, trim and crimp the edges, and cut decorative vents for steam to escape.
- Brush the pie crust with the beaten egg and sprinkle with sugar for a lightly sparkling finish.
- Bake at 400°F for 20 minutes, until the crust is starting to set and you see early bubbling at the vent spots.
- Reduce oven temperature to 350°F and bake for 35 to 40 minutes more, until the crust is golden and the filling is bubbling through the vents.
- Cool completely for at least 4 hours before slicing, so the filling fully sets and won’t run.