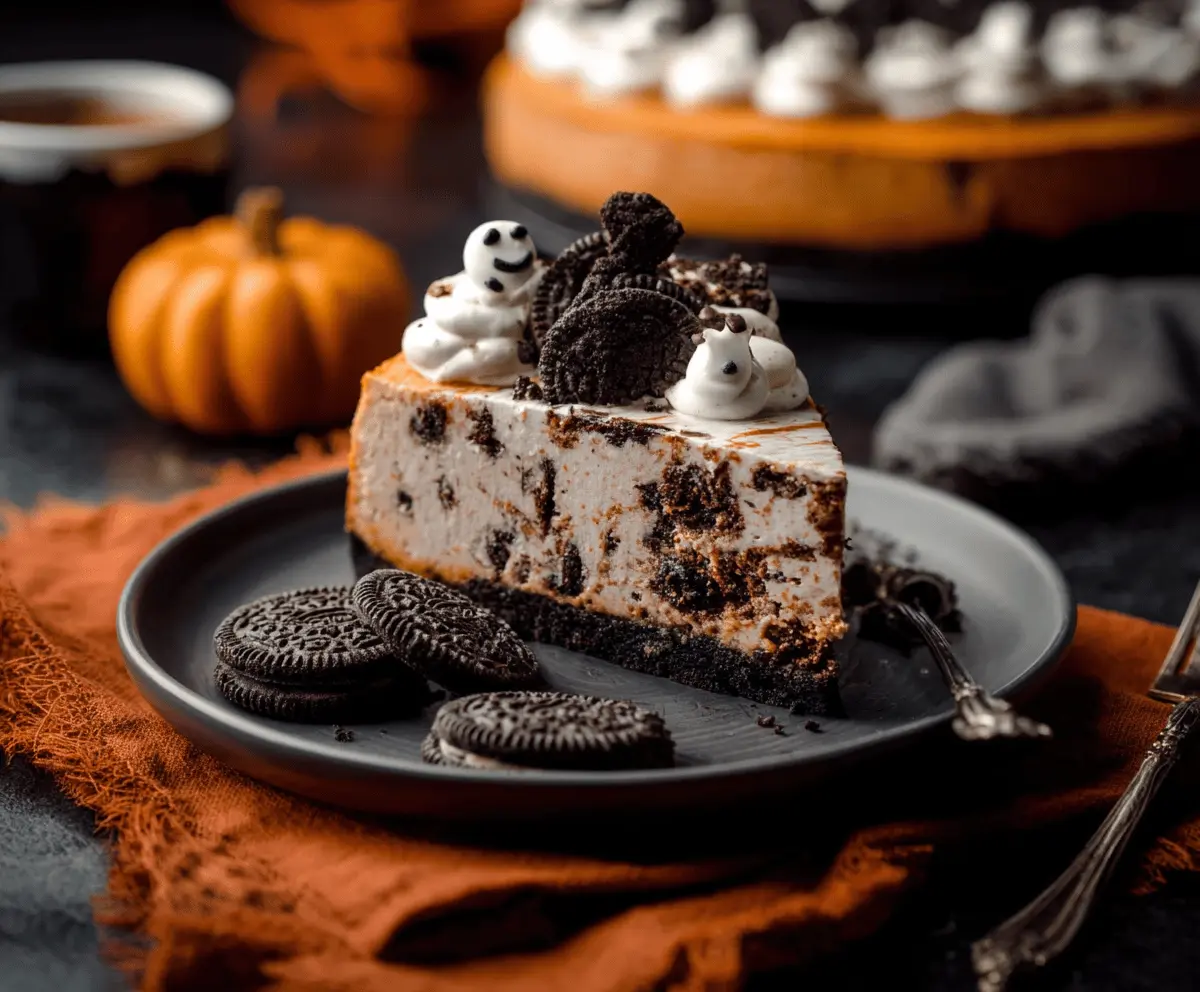
This Halloween Cookies and Cream Cheesecake is a spooky twist on a classic dessert! It’s creamy, dreamy, and loaded with crunchy cookies. Perfect for your Halloween party!
It’s so fun to serve this cheesecake with some creepy decorations. I love how the cookie crumbles add a delicious crunch. You might find yourself sneaking extra slices—no judgment here! 👻
Key Ingredients & Substitutions
Oreo Cookies: These are perfect for the crust and add that classic cookies and cream taste. If you’re looking for a gluten-free option, try gluten-free chocolate sandwich cookies instead!
Cream Cheese: Use full-fat cream cheese for the best creamy texture. If you want a lighter option, you can use Neufchâtel cheese instead, which has a lower fat content.
Sour Cream: This ingredient adds moisture and richness. If you’re out, plain Greek yogurt can be used as a substitute—it will give a similar tangy flavor!
Heavy Whipping Cream: Don’t skimp on this for the topping! It provides that delightful whipped cream layer. For a dairy-free option, consider coconut cream or whipped coconut topping.
What’s the Best Way to Bake a Cheesecake?
Baking a cheesecake might seem intimidating, but it is all about gentle heat and patience. Here’s how you can nail it:
- Preheat your oven so it’s ready. Use a water bath if you want, as it helps regulate the temperature and keep your cheesecake smooth.
- Don’t overbake! You want the edges set but a slight jiggle in the center. It’ll firm up as it cools.
- Let the cheesecake cool gradually in the oven. This prevents cracking. After an hour, cool at room temperature, then chill in the fridge for at least 4 hours.
With these tips and ingredient insights, you’re all set to make a spooky and fantastic Halloween Cookies and Cream Cheesecake!
Halloween Cookies and Cream Cheesecake
Ingredients You’ll Need:
For the Crust:
- 24 Oreo cookies (or similar chocolate sandwich cookies)
- 4 tablespoons unsalted butter, melted
For the Cheesecake Filling:
- 24 ounces (3 packages) cream cheese, softened
- 1 cup granulated sugar
- 3 large eggs
- 1 teaspoon vanilla extract
- 1 cup sour cream
- 1 cup crushed Oreo cookies (about 10 cookies)
- Orange food coloring (about 10–15 drops, or until desired color)
For the Topping:
- 1 cup heavy whipping cream
- 2 tablespoons powdered sugar
- 1 teaspoon vanilla extract
- Whole Oreo cookies for decoration, halved
- Additional crushed Oreos for garnish
- Chocolate sauce for drizzling
For Ghost Decoration:
- Mini marshmallows or small dollops of whipped cream
- Mini chocolate chips or black decorating gel for eyes and mouth
How Much Time Will You Need?
This Halloween Cookies and Cream Cheesecake requires about 20 minutes of active prep time, followed by approximately 50-60 minutes of baking time. After that, it will need to cool for about an hour and then chill in the fridge for at least 4 hours (or overnight). So, plan for a total of about 6 to 8 hours, mostly for chilling, to have this spooky delight ready to serve!
Step-by-Step Instructions:
1. Prepare the Crust:
Preheat your oven to 325°F (160°C). In a food processor, crush 24 Oreo cookies until they are finely crumbled. Mix these crumbs with melted butter in a bowl until it resembles wet sand. Press this mixture evenly into the bottom of a 9-inch springform pan to form the crust. Bake in the preheated oven for 10 minutes, then take it out and allow it to cool.
2. Make the Cheesecake Filling:
In a large mixing bowl, use an electric mixer to beat the softened cream cheese until it’s smooth and creamy. Gradually add the sugar and mix until fully combined. Add the eggs one at a time, mixing on low speed after each addition to avoid any splatters. Stir in the vanilla extract and sour cream, mixing until the batter is smooth and well combined.
3. Add Color and Cookies:
Next, add orange food coloring a few drops at a time until the batter reaches your desired shade of orange. Then, gently fold in the crushed Oreo cookies to add that cookies-and-cream texture throughout the batter.
4. Bake the Cheesecake:
Carefully pour the cheesecake batter over your cooled crust in the springform pan. Tap the pan on the counter a couple of times to push out any air bubbles. Bake for 50 to 60 minutes, or until the edges are set but the center still has a slight jiggle when gently shaken.
5. Cool and Chill:
After baking, turn off the oven and crack open the oven door slightly. Let the cheesecake cool in the oven for 1 hour. Once cooled, remove it from the oven and allow it to cool completely at room temperature before transferring it to the refrigerator. Chill for at least 4 hours, but overnight is best to allow it to set properly.
6. Prepare the Topping:
In a chilled mixing bowl, whip the heavy cream, adding powdered sugar and vanilla extract. Beat until stiff peaks form and the cream holds its shape.
7. Decorate the Cheesecake:
Spread the whipped cream evenly over the chilled cheesecake. Position the halved Oreo cookies around the top edge of the cheesecake, standing upright. Sprinkle additional crushed Oreos on top of the whipped cream for extra crunchiness.
8. Make the Ghost Decoration:
For a fun ghost effect, place a dollop of whipped cream or a mini marshmallow in the center of the cheesecake. Use mini chocolate chips or black decorating gel to make eyes and a mouth on the ghost.
9. Add Drizzles:
Lastly, drizzle chocolate sauce down the sides of your cheesecake for a spooky finish. The drizzles not only add flavor but also give that festive Halloween vibe!
10. Serve:
Carefully remove the sides of the springform pan. Slice the cheesecake and serve chilled for a delightfully spooky treats. Enjoy your Halloween Cookies and Cream Cheesecake!

Can I Use Different Cookies for the Crust?
Absolutely! While Oreos give a classic flavor, you can use any chocolate sandwich cookies or even graham crackers for a different taste. Just make sure to adjust the amount of sugar if the cookies you choose are already sweetened!
How Do I Prevent Cracking in My Cheesecake?
To minimize cracking, ensure you don’t overbake the cheesecake; it should still have a slight jiggle in the center when done. Additionally, cooling it gradually in the oven and chilling it properly afterward can help maintain a smooth top.
Can I Make This Cheesecake In Advance?
Definitely! This cheesecake can be made up to a day ahead. After chilling, it will hold up well in the fridge for up to 3 days. Just wait to add the whipped cream topping and decorations until you’re ready to serve it!
What’s the Best Way to Store Leftovers?
Store any leftover cheesecake in the fridge in an airtight container for up to 3 days. If you want to keep it longer, you can freeze it! Just wrap it tightly and it can last in the freezer for up to 2 months. Thaw it in the refrigerator before serving.