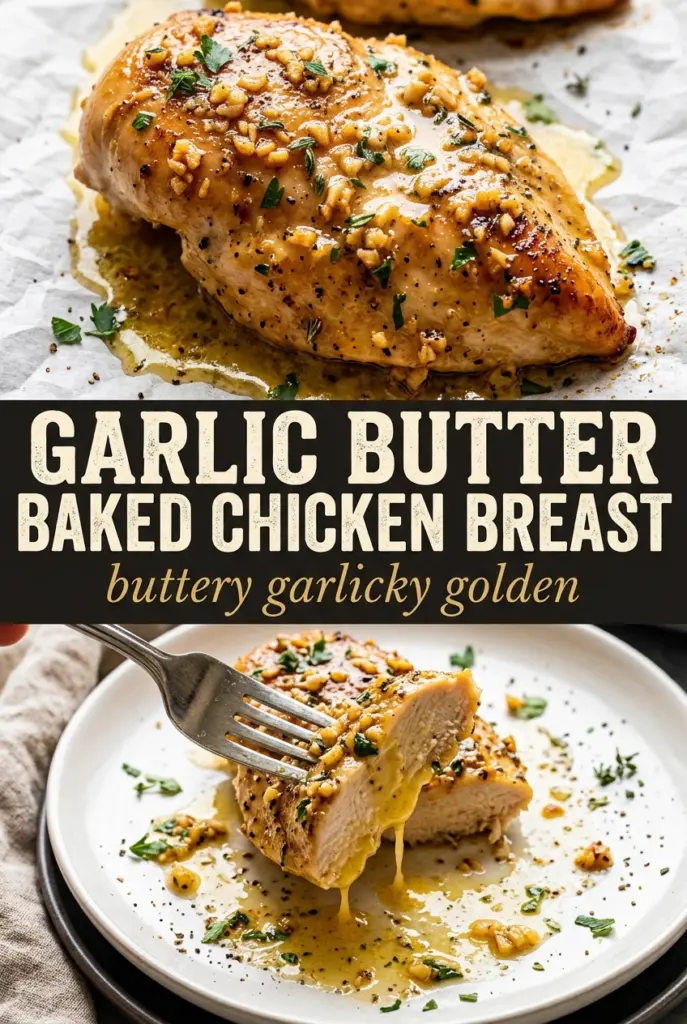
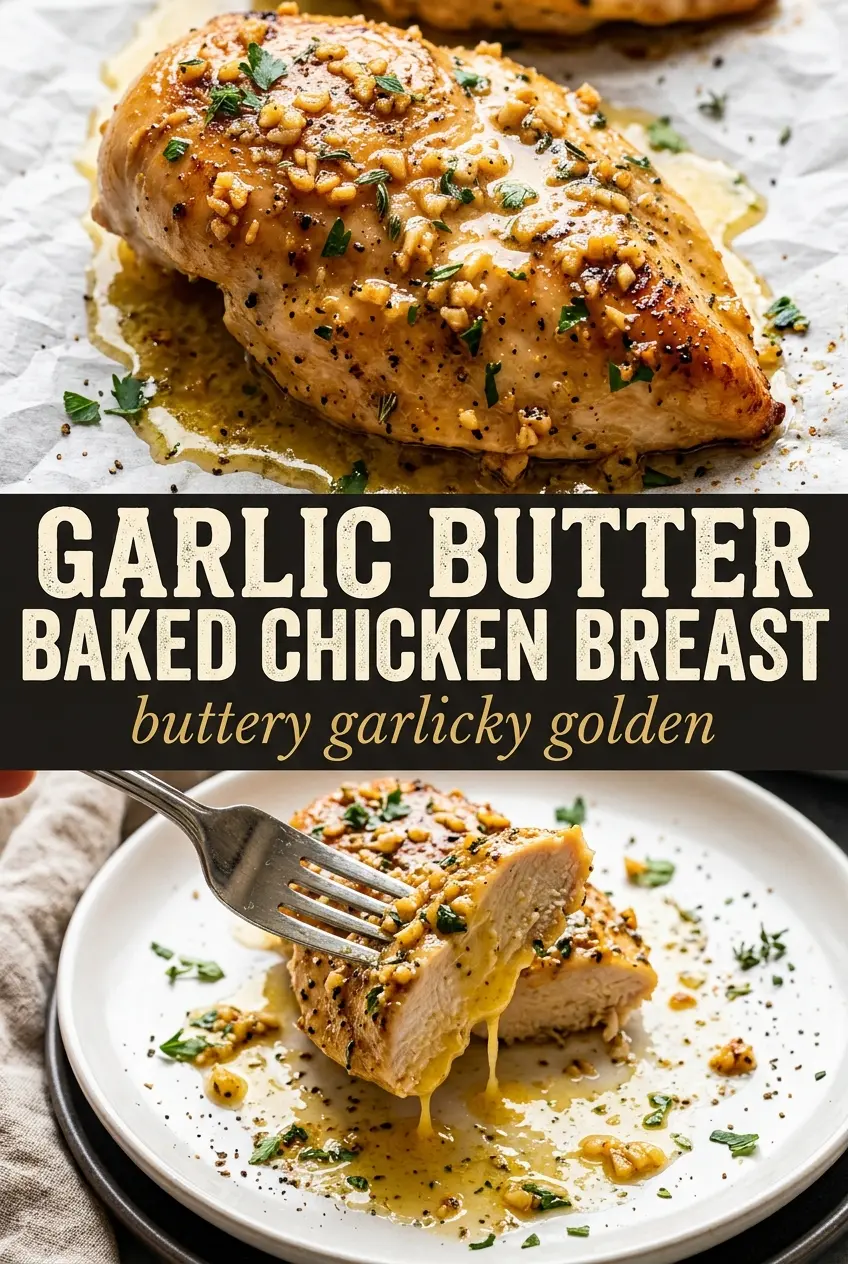
Garlic butter baked chicken breast earns a permanent spot in the dinner rotation because it stays juicy, picks up real color in the oven, and leaves you with a pan sauce worth spooning over everything on the plate. The butter turns golden at the edges, the garlic softens just enough to taste sweet instead of sharp, and the herbs cling to the chicken instead of sliding off into the dish.
The difference here is the way the butter is handled. It’s not just poured on top and forgotten. A quick baste halfway through keeps the surface glossy and helps the chicken cook evenly, while the pan juices collect all that garlic-herb flavor you’d otherwise miss. A hot oven does the heavy lifting, but the rest of the method is about protecting the breast meat from drying out.
Below, you’ll find the timing that keeps the chicken tender, what to watch for if your breasts are thick on one end, and a few practical swaps if you need to work with what’s already in the kitchen.
The butter sauce baked up glossy instead of greasy, and the chicken stayed juicy even the next day. I spooned the pan juices over rice and my husband asked if I was making “that chicken” again the following week.
Save this garlic butter baked chicken breast for the nights when you want juicy chicken and a buttery pan sauce without a pile of dishes.
The Part Most Baked Chicken Gets Wrong: Heat Too Low, Pan Too Crowded
Chicken breast dries out most often because it spends too long in the oven before the center is done. A 425°F oven gives the outside enough heat to set the surface and move the cooking along before the meat has time to lose too much moisture. Crowding the pan creates the opposite problem: the chicken steams in its own juices and the butter never really takes on that caramelized edge.
The other mistake is basting too early or too often. Once halfway through is enough here. Open the oven, spoon the hot butter over the tops, and get the pan back in fast. That quick hit of fat helps the surface stay supple while the garlic and herbs deepen in flavor.
- High heat matters — it shortens the cooking window, which is what keeps chicken breast from turning chalky.
- A little space between breasts — helps the butter pool and brown instead of simply disappearing.
- Resting is not optional — those 5 minutes let the juices settle back into the meat instead of spilling onto the cutting board.
What Each Ingredient Is Actually Doing in This Dish

- Chicken breasts — Use boneless, skinless breasts of similar size so they finish at the same time. If one is much thicker, pound the thick end lightly so the whole piece cooks evenly.
- Butter — This is the base of the sauce and the reason the chicken stays glossy. Salted or unsalted both work; if you use salted butter, go lighter with the added salt.
- Garlic — Fresh minced garlic gives the pan sauce its main character. Jarred garlic can work in a pinch, but it tastes sharper and less rounded after baking.
- Parsley, thyme, and rosemary — Parsley keeps things fresh, thyme brings a gentle earthiness, and rosemary gives the dish its unmistakable roast chicken feel. If you only have one herb, thyme is the one I’d keep.
- Lemon juice — It keeps the butter from tasting flat and cuts through the richness. Bottled juice works if that’s what you have, but fresh lemon gives a cleaner finish.
- Smoked paprika and garlic powder — These season the chicken directly and build a deeper savory layer under the butter. Don’t skip the dry seasoning step and expect the sauce alone to carry everything.
How I Build the Pan Sauce So the Chicken Stays Juicy
Season the chicken before the butter goes on
Season both sides of the chicken breast with salt, pepper, garlic powder, and smoked paprika before it ever hits the baking dish. That dry layer does two jobs: it seasons the meat itself and helps the surface take on a little more color under the butter. If you season only the top after adding the sauce, the flavor stays on the surface and the chicken tastes flat in the center.
Mix the butter while the oven heats
Stir the melted butter with garlic, parsley, thyme, rosemary, and lemon juice until the herbs are evenly suspended. The mixture should smell sharp, green, and buttery all at once. Pour it over the chicken so some of it collects around the base of the dish; that pooled butter is what you’ll baste with halfway through.
Bake until the center reaches 165°F, not until the top looks dark
Slide the dish into the hot oven and let the heat work. At about the halfway mark, spoon the pan juices over the tops once, then close the oven again. Pull the chicken when the thickest part reads 165°F; if you wait for the butter to look deeply browned, the chicken underneath is usually already past its best texture.
Rest before serving
Give the chicken 5 minutes on the counter before you cut it. This is when the juices settle back into the meat, which is why the first slice stays moist instead of flooding the plate. Spoon the pan juices over the top right before serving and add lemon wedges so each person can brighten their own portion.
Three Practical Ways to Adjust This Chicken Without Losing What Makes It Good
Make it dairy-free with olive oil and broth
Swap the butter for a good olive oil and add a splash of chicken broth to the pan so you still have enough liquid to baste. The sauce won’t be as rich or silky, but the garlic and herbs still carry the dish nicely. Use a little less oil than you would butter because oil doesn’t need to pool thickly to work.
Use chicken thighs for a richer, more forgiving result
Boneless thighs work well if you want a little more cushion against overcooking. They take a few minutes longer, but they stay tender even if the timing runs a little past ideal. Keep the same herb butter and watch for an internal temperature of 165°F to 170°F.
Add vegetables to turn it into a one-pan meal
Baby potatoes, thin carrot coins, or green beans can go around the chicken if they’re cut small enough to cook in the same window. Toss them lightly in oil first so they roast instead of soaking up all the butter and going soft. If you use potatoes, start them 10 minutes before the chicken so they finish at the same time.
Storage and Reheating
- Refrigerator: Store leftovers in an airtight container for up to 3 days. The chicken stays moist, though the butter sauce will firm up when chilled.
- Freezer: It freezes well for up to 2 months, though the sauce texture softens a bit after thawing. Slice the chicken before freezing if you want it to reheat more evenly.
- Reheating: Warm gently in a covered baking dish at 325°F with a spoonful of the pan juices or a splash of broth. High heat dries out chicken breast fast, so avoid the microwave if you want to keep the texture tender.
Answers to the Questions Worth Asking
Garlic Butter Baked Chicken Breast
Ingredients
Equipment
Method
- Preheat the oven to 425°F and lightly grease a baking dish.
- Season the chicken breasts on both sides with salt, pepper, garlic powder, and smoked paprika.
- Melt the butter and stir in garlic, parsley, thyme, rosemary, and lemon juice until combined.
- Set aside the garlic herb butter so it stays pourable.
- Place the chicken in the prepared dish and pour the garlic herb butter over each breast, coating thoroughly.
- Bake for 20-25 minutes, basting with the pan juices once at the halfway point.
- Bake until the internal temperature reaches 165°F, showing a golden surface.
- Rest the chicken for 5 minutes.
- Serve with pan juices spooned over and lemon wedges alongside.