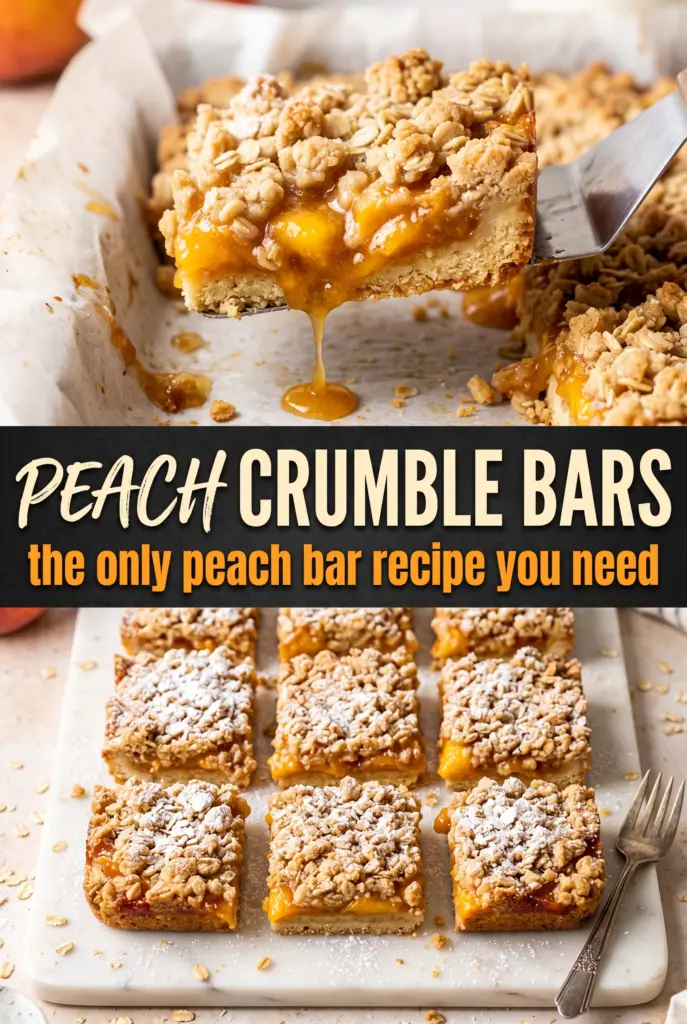
Peach crumble bars earn their spot because they give you three things at once: a sturdy shortbread base, a juicy peach layer, and a buttery oat topping that bakes up sandy and crisp instead of soggy. The best ones cut into clean squares without losing that soft peach center, and that comes down to how the crust is pre-baked and how the filling is thickened.
This version leans on cold butter, which matters more than most people think. When the butter stays in little pieces, it melts in the oven and leaves behind those tender, craggy pockets that make the topping taste like a proper crumble instead of a flat crumb dough. Cornstarch does the quiet work in the filling, catching the peach juices so the bars set firmly once they cool.
Below you’ll find the small details that keep the layers distinct, plus a few ways to adapt the bars if your peaches are especially ripe or you need to work with what you have on hand.
The peach layer set up beautifully and the bars held together even after chilling overnight. The crumble stayed crisp on top, and the lemon really made the peaches taste brighter.
Save these peach crumble bars for when you want a clean-cut peach dessert with a buttery oat topping and no fuss.
The Reason Peach Bars Turn Soggy Instead of Slice Cleanly
The mistake that ruins most peach bars is a wet filling sitting on an underbaked base. Fresh peaches release a lot of juice, and if the crust doesn’t get a head start in the oven, that juice soaks straight through before the bars ever have a chance to set. The result is a bottom layer that tastes good but falls apart the second you lift a square.
Prebaking the base for just 10 minutes changes everything. It firms the crust enough to act like a barrier, and the cornstarch in the peach layer thickens the fruit juices as the bars bake. Cooling matters too. If you cut them while they’re still warm, the filling hasn’t finished setting and the crumble will slide.
- Cold butter — This is what gives the crumble its sandy, layered texture. If the butter softens too much before baking, the topping turns pasty instead of crisp.
- Rolled oats — They add chew and structure to the topping. Quick oats can work in a pinch, but the crumble will be a little denser and less nubby.
- Fresh peaches — Use peaches that are ripe but not mushy. Overripe fruit breaks down too quickly and makes the filling looser.
- Cornstarch — This is the thickener that keeps the peach layer from running. Flour won’t set quite as cleanly here, so cornstarch is the better choice.
- Lemon juice — It sharpens the peaches and keeps the filling from tasting flat. You only need a small amount, but it makes the fruit taste fresher.
What Each Ingredient Is Actually Doing in This Peach Recipe

- Peaches (the star ingredient) — Ripe peaches are essential. Quality impacts final dish.
- Sugar (the sweetness) — Enhances peach flavor without overpowering. Adjust based on ripeness.
- Lemon juice (the brightness) — Brings out peach flavor and prevents cloying. Essential, not optional.
- Butter or oil (the richness) — Carries flavors and creates satisfying texture. Don’t skip.
- Spices (cinnamon, ginger, or nutmeg) — Warm up peach flavor without overwhelming. Use in balance.
- Texture element (nuts, crumble, or crispy topping) — Prevents monolithic texture. Add before serving.
- Optional thickener (cornstarch or flour) — Creates right consistency. Essential for thick fillings.
- Finishing touch (fresh herbs, glaze, or garnish) — Adds aroma and visual appeal. Keeps fresh.
Building the Layers So the Bars Hold Their Shape
Mix the Crumble Until It Looks Pebbly, Not Smooth
Combine the flour, oats, brown sugar, cinnamon, and salt first, then cut in the cold butter until the mixture forms uneven crumbs and a few larger clumps. You want it to look like damp sand with some pebble-sized pieces. If you keep working it until it turns uniform, the topping bakes up compact instead of crumbly.
Press the Base Firmly and Give It a Short Head Start
Press two-thirds of the mixture into the parchment-lined pan with enough pressure that it feels packed and even. An offset spatula or the bottom of a measuring cup helps here. Bake it just until set, not browned all the way through; the crust should look matte and lightly dry on top, which tells you it can support the filling.
Thicken the Peach Filling Before It Hits the Pan
Toss the diced peaches with sugar, cornstarch, lemon juice, and vanilla until every piece looks lightly coated. The cornstarch needs to be mixed in before baking so it can disperse through the juices as they release. Spread the filling over the warm base, then scatter the remaining crumble over the top without pressing it down.
Cool Completely Before You Cut
The bars need time to set as they cool. If you lift them too early, the peach layer will slide and the edges won’t hold. Let the pan come all the way to room temperature, then use the parchment to lift the slab out before slicing into squares with a sharp knife.
How to Adapt These Bars When You Need a Different Version
Make Them Gluten-Free
Use a 1:1 gluten-free flour blend in place of the all-purpose flour, and check that your oats are certified gluten-free. The texture stays close to the original, though the crust may be a touch more delicate when sliced.
Use Frozen Peaches When Fresh Aren’t Great
Thaw the peaches first and drain off excess liquid before mixing them with the sugar and cornstarch. Frozen fruit brings more moisture, so skipping that drain step can leave the filling loose.
Swap in Other Stone Fruit
Nectarines, plums, or a mix of stone fruit all work in the same amount. If the fruit is tarter than peaches, add an extra tablespoon of sugar to the filling so the bars don’t taste sharp once baked.
Make Them Dairy-Free
Use a solid plant-based butter stick instead of dairy butter. The bars still bake up with a good crumble, but choose one that behaves like butter in baking, not a soft tub spread.
Storage and Reheating
- Refrigerator: Store covered for up to 5 days. The crumble softens a little in the fridge, but the bars hold together well.
- Freezer: These freeze well. Wrap individual bars tightly and freeze for up to 2 months, then thaw in the refrigerator overnight.
- Reheating: Serve them chilled or let them sit at room temperature for 15 to 20 minutes. If you warm them, use a low oven for a few minutes; the microwave softens the topping and makes the crust less crisp.
Questions I Get Asked About These Peach Crumble Bars

Peach Crumble Bars
Ingredients
Equipment
Method
- Preheat the oven to 375F and line a 9x9 pan with parchment so the bars lift out easily. Make sure the parchment overhangs a bit for clean removal.
- Mix all-purpose flour, rolled oats, brown sugar, cinnamon, and salt together in a bowl until evenly combined. The mixture should look sandy and uniform.
- Add cold, cubed unsalted butter and cut it into the dry mix until large clumps and crumbles form. Stop when you can squeeze a clump that holds together.
- Press two-thirds of the crumble mixture firmly into the bottom of the prepared pan. Compress it as evenly as possible so the base bakes into a cohesive layer.
- Bake the base at 375F for 10 minutes until just set. Look for a light color change and a firm surface that doesn’t look wet.
- Toss the diced fresh peaches with granulated sugar, cornstarch, lemon juice, and vanilla extract until evenly coated. The peaches should look glossy and slightly thickened.
- Spread the peach filling over the warm base in an even layer. Keep the edges covered so the bars stay uniform when sliced.
- Scatter the remaining crumble evenly on top. The layer should look thick and mostly cover the peach filling.
- Bake at 375F for 25-28 minutes until golden. Use a visual cue: a browned crumble top and bubbling peach filling at the edges.
- Cool the bars completely in the pan before lifting and slicing. The bars should hold their shape cleanly without crumbling.