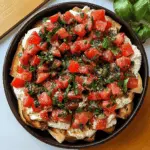
Crack chicken deviled eggs hit that sweet spot between nostalgic and snackable: creamy yolk filling, ranch-seasoned chicken, sharp cheddar, and bacon in one chilled bite. They vanish fast because they eat like a deviled egg and taste like a loaded chicken appetizer at the same time.
The filling works because the yolks are mashed with mayo and cream cheese first, before the chicken and cheddar go in. That gives you a smooth, pipeable base instead of a chunky mixture that tears the whites. The ranch seasoning brings the familiar crack-chicken flavor without needing extra ingredients, and a little chopped chives on top keeps the whole thing from tasting heavy.
Below, I’ve included the timing that keeps the yolks tender, the one texture cue that matters when you mash the filling, and a few smart swaps for making these fit what’s already in your fridge.
The filling was perfectly creamy and held its shape in the egg whites, and the bacon stayed crisp even after chilling. I brought these to a potluck and came home with an empty tray.
Save these crack chicken deviled eggs for the appetizer tray that needs creamy filling, crunchy bacon, and a little ranch kick.
The Trick to Keeping the Filling Creamy Instead of Grainy
The filling turns out best when the yolks are mashed while they’re still warm enough to break down smoothly, but not hot enough to melt the cream cheese into a greasy slick. Start with the yolks, mayo, cream cheese, and ranch seasoning, and work them until the mixture looks fluffy and completely even. If there are small yellow bits left behind, those streaks will show in the finished eggs and make piping harder.
The other place people get tripped up is adding the chicken too early. Fold it in after the base is smooth so the filling stays cohesive and the chicken stays in small, even pieces instead of getting shredded into paste. That balance gives you a filling that holds its shape without feeling dense.
What the Ranch, Cream Cheese, and Bacon Each Do Here

- Egg yolks — These are the backbone of the filling, so use fully cooled eggs that peel cleanly. Overcooked yolks turn dry and chalky, which makes the whole mixture taste heavy.
- Cream cheese — This is what gives the filling its thicker, more spoonable texture. Soften it fully before mixing; cold cream cheese leaves little lumps that never disappear completely.
- Dry ranch seasoning — This delivers the crack-chicken flavor in one step. If you swap in bottled ranch dressing, the filling gets looser and the seasoning tastes flatter.
- Chicken, cheddar, and bacon — The chicken gives the eggs their signature twist, cheddar adds salt and bite, and bacon brings the crunchy finish. Finely shred the chicken so it blends into the filling instead of falling out when you bite in.
- Chives — These add a fresh onion note that cuts through the richness. Don’t skip them if you want the eggs to taste balanced instead of all cream and bacon.
Building the Filling and Assembling the Eggs Without a Mess
Cooking the Eggs Cleanly
Set the eggs in cold water, bring the pot to a boil, then turn off the heat and cover it for the full 12 minutes. That method gives you firm whites and yolks that are set but still creamy, not chalky and gray around the edges. The ice bath matters because it stops the cooking fast and helps the shells slip off more cleanly. If the shells cling, the eggs were probably too fresh or didn’t cool long enough.
Mashing the Yolk Base
Move the yolks to a bowl and mash them with the mayonnaise, softened cream cheese, and ranch seasoning until the mixture looks smooth and light. A fork works, but a small hand masher or whisk gets you there faster. Stop as soon as the texture turns creamy; overmixing can make the base sticky instead of airy. This is the stage where the filling should look like a thick, pipeable spread.
Folding in the Chicken and Toppings
Stir in the shredded chicken, cheddar, and half the bacon just until everything is distributed evenly. The mixture should still hold together on a spoon without slumping. Spoon or pipe it into the egg whites, then finish with the remaining bacon and chives right before serving. If you top them too far ahead, the bacon softens and loses the contrast that makes these eggs stand out.
How to Adapt These Deviled Eggs for Different Crowds
Make Them Ahead for a Party Tray
You can boil the eggs, make the filling, and cook the bacon a day ahead. Keep the whites and filling separate until a few hours before serving so the eggs stay neat and the filling doesn’t dry out. Add the bacon and chives at the end for the best texture.
Dairy-Free Version
Use a dairy-free mayo and skip the cream cheese, then add a little extra mayo to keep the filling smooth. The result will be a touch looser and less rich, but the ranch, chicken, and bacon still carry the flavor well.
No Chicken on Hand
Leave out the chicken and increase the bacon slightly, or add a little extra cheddar for more body. You’ll lose the full crack-chicken effect, but the eggs still taste rich, savory, and snackable.
Storage and Reheating
- Refrigerator: Store covered for up to 2 days. The bacon softens a little, but the filling stays steady.
- Freezer: Don’t freeze these. The egg whites turn rubbery and the filling separates after thawing.
- Reheating: These are best served cold. If they’ve been chilled hard, let them sit out for 10 to 15 minutes before serving so the filling tastes creamier.
Questions I Get Asked About This Recipe

Crack Chicken Deviled Eggs
Ingredients
Equipment
Method
- Place large eggs in a Dutch oven, cover with cold water, and bring to a boil; cover and remove from heat, then let stand at room temperature for 12 minutes.
- Chill the eggs in an ice bath for 10 minutes, then peel and halve lengthwise.
- Mash the egg yolks with mayonnaise, cream cheese, and dry ranch seasoning until smooth.
- Fold in cooked chicken, shredded cheddar, and half of the bacon until evenly combined.
- Spoon the filling generously into the egg whites, mounding for a loaded look.
- Top with the remaining bacon and fresh chives, then chill until serving.