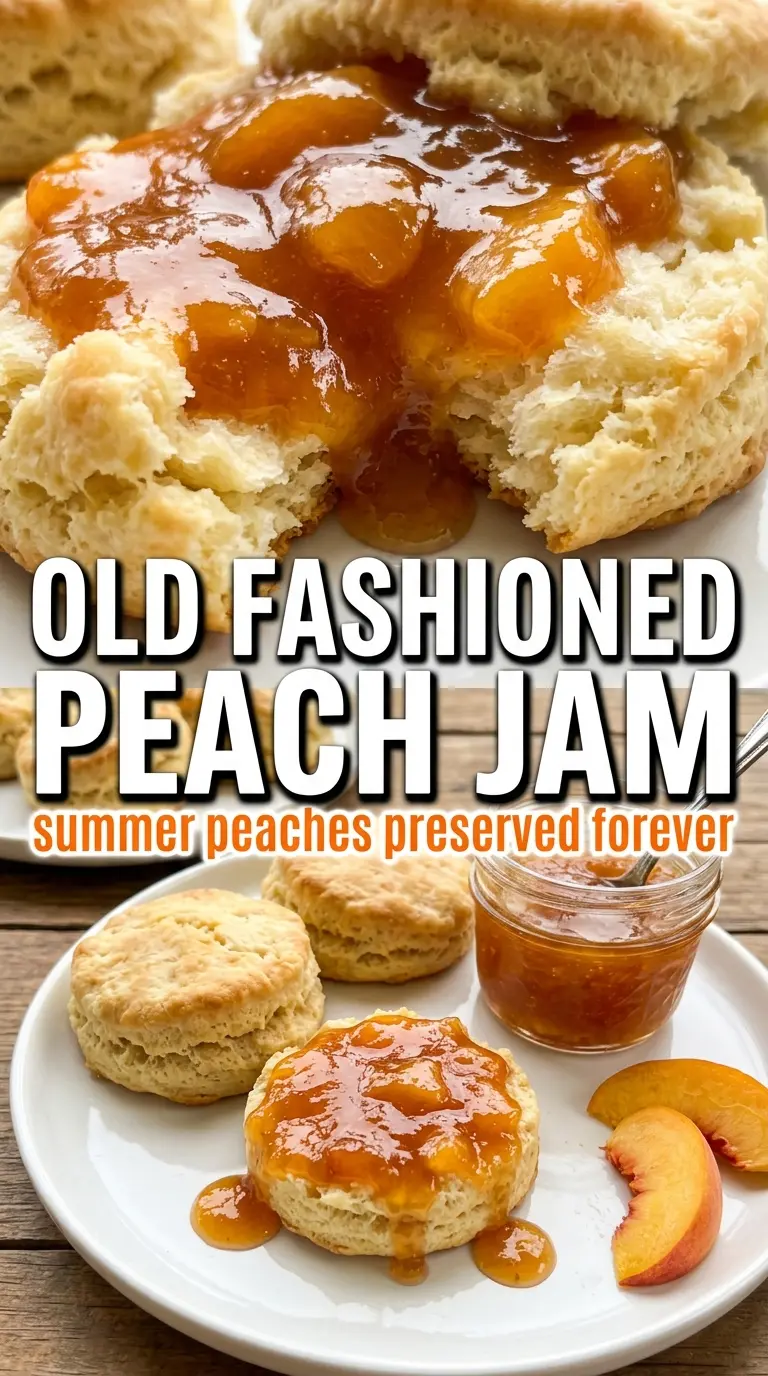
Thick, amber peach jam with soft fruit pieces is the kind of thing that disappears fast once the jar is open. This old-fashioned version cooks down to a glossy set that still tastes like peaches first, sugar second, with just enough lemon to keep the sweetness bright instead of flat.
What makes this jam work is patience at two points: letting the fruit sit with the sugar so it gives off juice, then cooking it long enough for the natural pectin to do its job. The peaches soften into a chunky preserve instead of turning into a smooth paste, and the lemon juice helps the jam set while lifting the flavor. A little lemon zest adds depth without making it taste sharp.
Below, I’ve included the timing cue I trust most for checking the set, along with a few substitutions and storage notes that actually matter when you’re filling jars for the pantry.
The jam set up beautifully and the peach pieces stayed intact instead of turning mushy. I did the cold plate test at 40 minutes and it wrinkled just like you said, which saved me from overcooking it.
Old Fashioned Peach Jam with chunky fruit and a glossy amber set — keep this one for toast, biscuits, and gifting season.
The Part That Keeps Peach Jam from Turning Thin and Syrupy
Peach jam goes wrong when the fruit releases a lot of liquid and the cook stops before that liquid has actually reduced. If you rush the boil, you end up with a loose topping that looks promising in the pot but runs off toast the next morning. The answer is not extra sugar. It’s letting the peaches and sugar sit first, then cooking until the bubbles look thicker and the jam starts to sheet instead of splash.
The cold plate test matters here. A small spoonful should wrinkle when pushed with your finger after it has had a minute to cool. If it still looks glossy and slides cleanly, it needs more time. The other mistake is stirring too slowly once the jam starts to thicken; that’s when peaches catch on the bottom of the pot and pick up a scorched flavor.
What Each Ingredient Is Actually Doing in This Jam
- Ripe peaches — Use fruit that smells fragrant and yields slightly to pressure. Underripe peaches stay firm and taste flat; overripe ones can make the jam grainy and muddy. If your peaches aren’t super juicy, let them sit with the sugar the full 30 minutes so they draw out enough liquid for a proper cook.
- Granulated sugar — This isn’t just for sweetness. It helps the jam gel and gives the finished preserve its shiny, spoonable body. Cutting the sugar significantly changes both the set and the safety of the preserve, so this is one recipe where the ratio matters.
- Fresh lemon juice — The acid brightens the peaches and supports the set. Bottled lemon juice works in a pinch, but fresh gives a cleaner finish. Don’t skip it if you want the jam to taste balanced instead of heavy.
- Lemon zest — Zest adds a quiet citrus lift that keeps the jam tasting round and fresh after the long simmer. Use only the yellow outer layer so you don’t bring in bitterness.
- Cinnamon — Optional, but a tiny amount adds warmth without turning the jam into a spiced preserve. Stir it in at the end so it stays gentle and doesn’t take over the peach flavor.
Cooking the Jam Until It Catches on the Spoon
Letting the Fruit Macerate
Combine the peaches, sugar, lemon juice, and lemon zest in a heavy pot and let them sit for 30 minutes. The sugar pulls moisture from the fruit, which gives you enough liquid to start cooking without scorching the bottom. If you skip this rest, the jam takes longer to come together and is more likely to stick before the peaches soften evenly.
Bringing It to a Real Boil
Set the pot over medium-high heat and stir often as the mixture comes up to a boil. You want active bubbling across the whole surface, not a few lazy bubbles around the edges. Once it boils, reduce the heat to medium so the jam keeps moving without splattering all over the stove. If the boil is too weak, the fruit will stew instead of concentrating.
Watching for the Set
Cook for 35 to 45 minutes, stirring often and scraping the bottom and corners of the pot. The jam thickens as the water cooks off, and the color shifts from bright peach to deep gold. When a spoonful dropped on a cold plate wrinkles after a minute, it’s ready. If it still runs like syrup, keep cooking in short bursts and test again, because peaches can go from loose to perfect fast once the sugars tighten up.
Adding the Cinnamon and Filling the Jars
If you’re using cinnamon, stir it in during the last 5 minutes so it stays warm and subtle. Ladle the jam into sterilized jars, leaving 1/4-inch headspace so the seals can form properly. Wipe the rims clean before sealing. Any sticky residue can keep a jar from closing tight, which is the kind of small problem that ruins all that work.
Make It Without Cinnamon
Leave the cinnamon out and the jam tastes cleaner and more purely peach-forward. This is the best version if you want something classic for biscuits, toast, or layering into yogurt, because nothing competes with the fruit.
Lower-Sugar Peach Jam
You can cut the sugar a little, but the jam will cook longer and set more softly. The flavor becomes brighter and less candy-like, though the yield may be a bit lower and the texture won’t be quite as glossy.
Frozen Peaches Work Fine
Thawed frozen peaches can replace fresh ones, and they’re a solid option when peach season has passed. Drain off any excess liquid after thawing so you don’t start with too much water in the pot, then cook the jam the same way.
Storage and Reheating
- Refrigerator: Store sealed jars in the fridge for up to 3 weeks if you’re not water-bath processing them. The jam may firm up a little more after chilling.
- Freezer: This jam freezes well if you leave headspace in freezer-safe containers. Thaw it in the refrigerator; don’t try to speed it up on the counter if you want to keep the texture even.
- Reheating: Warm only the amount you need in a small saucepan over low heat. High heat can thin the set and make the sugar taste sharp instead of round.
Answers to the Questions Worth Asking

Old Fashioned Peach Jam
Ingredients
Equipment
Method
- Combine the ripe peaches, granulated sugar, fresh lemon juice, and lemon zest in a large heavy-bottomed pot, then let sit for 30 minutes to draw out juices, stirring once midway. You should see syrup form around the peach pieces as the sugar dissolves.
- Bring the mixture to a boil over medium-high heat, stirring frequently to keep peaches from sticking or scorching. Look for rapid bubbling that fills the pot’s center.
- Reduce heat to medium and cook for 35-45 minutes, stirring often to prevent sticking, until the jam thickens. The texture should be slow and glossy, and a small amount dropped on a cold plate should wrinkle when pushed.
- Add cinnamon if using during the last 5 minutes of cooking, then continue stirring to fully distribute it. The jam should smell warmly spiced while still looking amber and fruit-chunky.
- Ladle the hot jam into sterilized jars, leaving 1/4-inch headspace. Stop when the fruit settles evenly and the surface looks level in each jar.
- Process the jars in a boiling water bath for 10 minutes. After processing, let jars cool until sealed and no longer move when gently pressed.
- If refrigerating instead of canning, cool the jars to room temperature, then store for up to 3 weeks. The jam should set into a glossy, spreadable consistency as it chills.