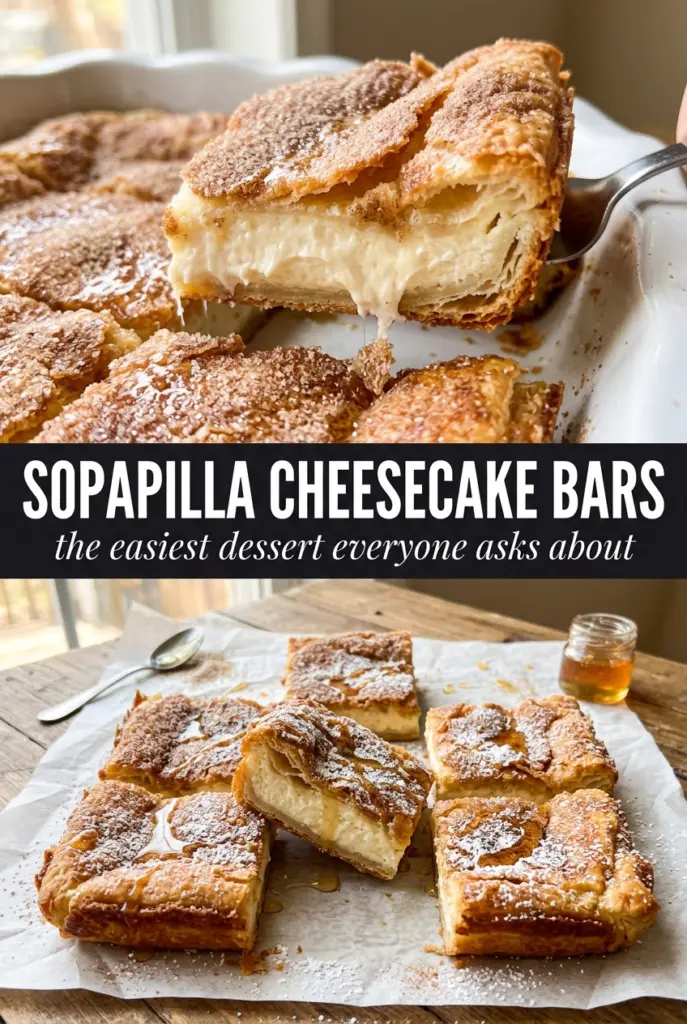
Soft cheesecake, buttery crescent layers, and a crackly cinnamon-sugar top turn these sopapilla cheesecake bars into the kind of dessert people hover over with a fork in hand. The filling bakes up smooth and rich, while the top turns deeply golden and crisp enough to hold its shape after chilling. You get all the comfort of a baked cheesecake without the fuss of a springform pan or water bath.
What makes this version work is the contrast. The bottom dough bakes into a tender crust, the cream cheese layer stays plush, and the second sheet of dough gives you that pastry-like top that catches the butter and cinnamon sugar. The caramel goes on while the bars are still warm, so it settles into the surface instead of just sitting on top in a sticky layer.
Below, you’ll find the small details that matter most, including how to keep the filling from turning grainy and how to cut clean squares after chilling. If you’ve ever had sopapilla cheesecake bars collapse into a messy pan, the notes here will help you avoid that.
The cream cheese layer baked up smooth and the top stayed crisp even after chilling overnight. I cut clean squares with no gooey middle, and the caramel soaked in just enough to make every bite taste like a bakery dessert.
Save these sopapilla cheesecake bars for the nights when you want a creamy, cinnamon-sugar dessert with a crisp golden top.
The Reason the Filling Stays Smooth Instead of Baking Up Grainy
This dessert lives or dies by the cream cheese mixture. If the cream cheese is still cool in the center, the batter looks smooth for a minute and then turns lumpy once the sugar and eggs go in. Softened cream cheese beats into a satiny base that bakes evenly, and that matters here because the filling doesn’t get much time in the oven before the top is already golden.
The eggs need to go in one at a time. That sounds fussy, but it keeps the filling from loosening too fast and helps it bake into a clean slice instead of a custardy puddle. You want the center set at the edges and still slightly jiggly in the middle when it comes out; carryover heat finishes the job during cooling.
What Each Layer Is Doing in These Bars
- Crescent roll dough — This is the shortcut that gives you both the base and the top without rolling out pastry. It bakes up tender on the bottom and crisp at the edges on top. If you can find dough sheets, those are easiest, but regular crescent dough works fine once you pinch the seams together.
- Cream cheese — Full-fat cream cheese gives the bars their classic tang and dense, creamy texture. Lower-fat versions can bake up softer and a little watery. If you’re tempted to use whipped cream cheese, skip it; it won’t set the same way.
- Cinnamon sugar — This isn’t just for sweetness. It gives the bars that sopapilla-style finish and keeps the top from tasting flat. Use fresh cinnamon if yours has been sitting in the cabinet for years, because old cinnamon fades fast.
- Caramel sauce — A good jarred caramel sauce is fine here. The key is warming it just enough to drizzle smoothly so it sinks into the top layer a little without running off the sides. If you want a deeper, more buttery finish, use a thick caramel topping rather than a thin ice cream sauce.
Building the Layers Without Sinking the Top
Pressing the Bottom Crust
Grease the pan well, then press the first sheet of crescent dough into an even layer across the bottom. Work it all the way to the corners so the filling doesn’t sneak underneath and leave you with soggy edges. If the dough tears, patch it with your fingers; small seams disappear once it bakes.
Mixing the Cheesecake Filling
Beat the cream cheese and sugar until the mixture looks glossy and completely smooth, then add the eggs one at a time. Scrape the bowl after each addition so no streaks of cream cheese hide along the sides. The vanilla and cinnamon go in last, and the batter should look thick but pourable, not fluffy.
Sealing the Top Layer
Lay the second sheet of dough over the filling in pieces if needed, because stretching it too hard can pull the filling with it. Brush the melted butter over every exposed spot, then shower on the cinnamon sugar. That butter is what helps the topping turn crisp and bronzed instead of pale and dry.
Baking Until Set
Bake until the top is golden and the center has just a slight wobble when you gently shake the pan. If the middle still sloshes, it needs more time; if you wait until it’s completely firm in the oven, the bars can end up dry once chilled. Let the pan cool fully before the caramel goes on, then chill for at least two hours so the layers slice cleanly.
Ways to Adjust These Bars Without Losing the Texture
Gluten-Free Version
Use a gluten-free crescent-style dough if you can find one, or a gluten-free puff pastry sheet for a flakier result. The texture changes a bit, but you still get that crisp top and creamy center. Bake it until the pastry is deeply golden, since gluten-free dough often looks done before it is.
Less Sweet, More Cheesecake
Cut the sugar in the filling by 1/4 cup if you want the tang of the cream cheese to stand out more. The bars will still set properly, but the result leans a little more dessert-for-grownups than candy-sweet. Keep the cinnamon sugar topping the same so the top still bakes with that classic sopapilla finish.
Dairy-Free Swap
Use a dairy-free cream cheese that bakes well and a plant-based butter substitute for the topping. The filling won’t taste exactly the same, and some dairy-free creams bake softer, so chill the bars longer before cutting. A thicker caramel-style sauce with no dairy ingredients works best on top.
Make-Ahead for a Crowd
Bake the bars a day ahead and chill them overnight before slicing. The texture improves as it rests, and the layers cut cleaner after the caramel has settled. For the neatest squares, wipe your knife between cuts and use a long, sharp blade instead of a serrated one.
Storage and Reheating
- Refrigerator: Store covered for up to 5 days. The topping softens slightly, but the flavor gets better after the first day.
- Freezer: Freeze cut bars in a single layer, then wrap them well and store for up to 2 months. Thaw in the refrigerator so condensation doesn’t make the top sticky.
- Reheating: These are best served chilled or cool, not hot. If you want to loosen the caramel a bit, let a bar sit at room temperature for 10 to 15 minutes rather than microwaving it, which can make the filling greasy and the dough soggy.
The Questions That Come Up Before the First Pan Is Gone

Sopapilla Cheesecake Bars
Ingredients
Equipment
Method
- Preheat the oven to 350°F. Grease a 9x13 baking dish, press the first can of crescent roll dough into the bottom, and pat it evenly.
- Mix 1 tbsp sugar with 1/2 tsp cinnamon. Sprinkle lightly over the dough to create an even cinnamon-sugar base.
- Beat the softened cream cheese and 1 cup sugar until creamy, scraping the sides as needed. This should look smooth and thick.
- Add the eggs one at a time, beating well after each addition. Make sure the mixture turns glossy and fully combined after every egg.
- Stir in the vanilla extract and 1/2 tsp cinnamon. Spread this creamy filling evenly over the crust.
- Press the second can of crescent roll dough over the cheesecake filling. Cover the surface so the filling is fully sandwiched between layers.
- Brush the top with melted butter. Sprinkle with a cinnamon-sugar mixture made from 2 tbsp sugar and 1 tsp cinnamon.
- Bake at 350°F for 30–35 minutes. The topping should be golden and the cheesecake should be set but still slightly jiggly in the center.
- Drizzle warm caramel sauce over the bars. Aim for an even, glossy layer across the top.
- Cool completely before slicing. Then refrigerate for at least 2 hours so the bars cut cleanly and hold their layers.