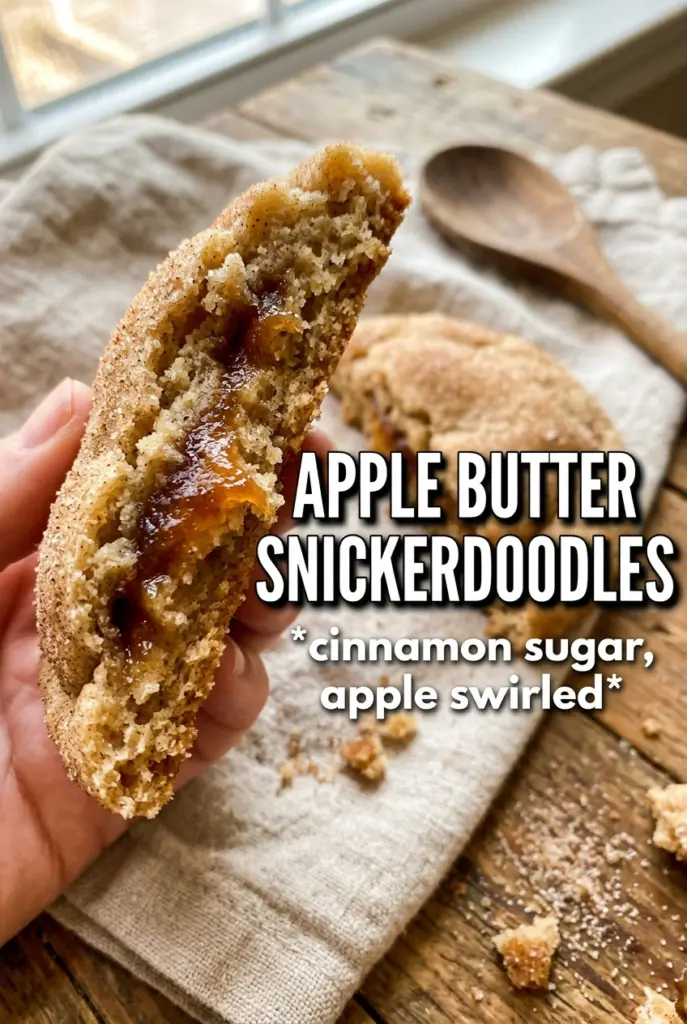
Apple butter snickerdoodles bake up soft, crinkled, and warmly spiced with that classic snickerdoodle tang hiding underneath a deeper, fruitier note. The edges set into a delicate golden rim while the centers stay plush, almost pillowy, and the cinnamon-sugar coating turns just a little sandy and crisp in the oven.
What makes this version stand out is the apple butter. It adds moisture, apple-caramel depth, and a touch of concentrated fruit flavor without making the dough cakey or heavy. Cream of tartar still does its job for that familiar snickerdoodle texture, and the dough is handled gently so the cookies spread just enough to crack and wrinkle instead of baking up flat.
Below, I’ve included the one trick that keeps the dough easy to work with, plus a few substitutions and storage notes so you can bake these without guessing.
The dough was soft but still easy to scoop after chilling, and the cookies came out with those cracked cinnamon tops and a tender middle that stayed soft the next day.
Save these apple butter snickerdoodles for the soft, crinkled cookies with that extra caramelized apple depth.
The Reason These Cookies Stay Soft Instead of Drying Out
The problem with a lot of snickerdoodle variations is that they either lose the signature tang or bake up dry once extra moisture gets added. Apple butter can tip a dough toward cakey if you’re not careful, which is why the balance here matters. The butter and sugar are beaten until light enough to trap air, but the dough isn’t overworked after the flour goes in, so the cookies still spread and crack the way they should.
Cream of tartar is part of what keeps these tasting like snickerdoodles instead of plain spice cookies. It brings the gentle tang and helps the texture stay tender. The short chill also gives the dough time to firm up just enough for clean scooping without letting the cookies turn dense.
What Each Ingredient Is Doing in the Dough
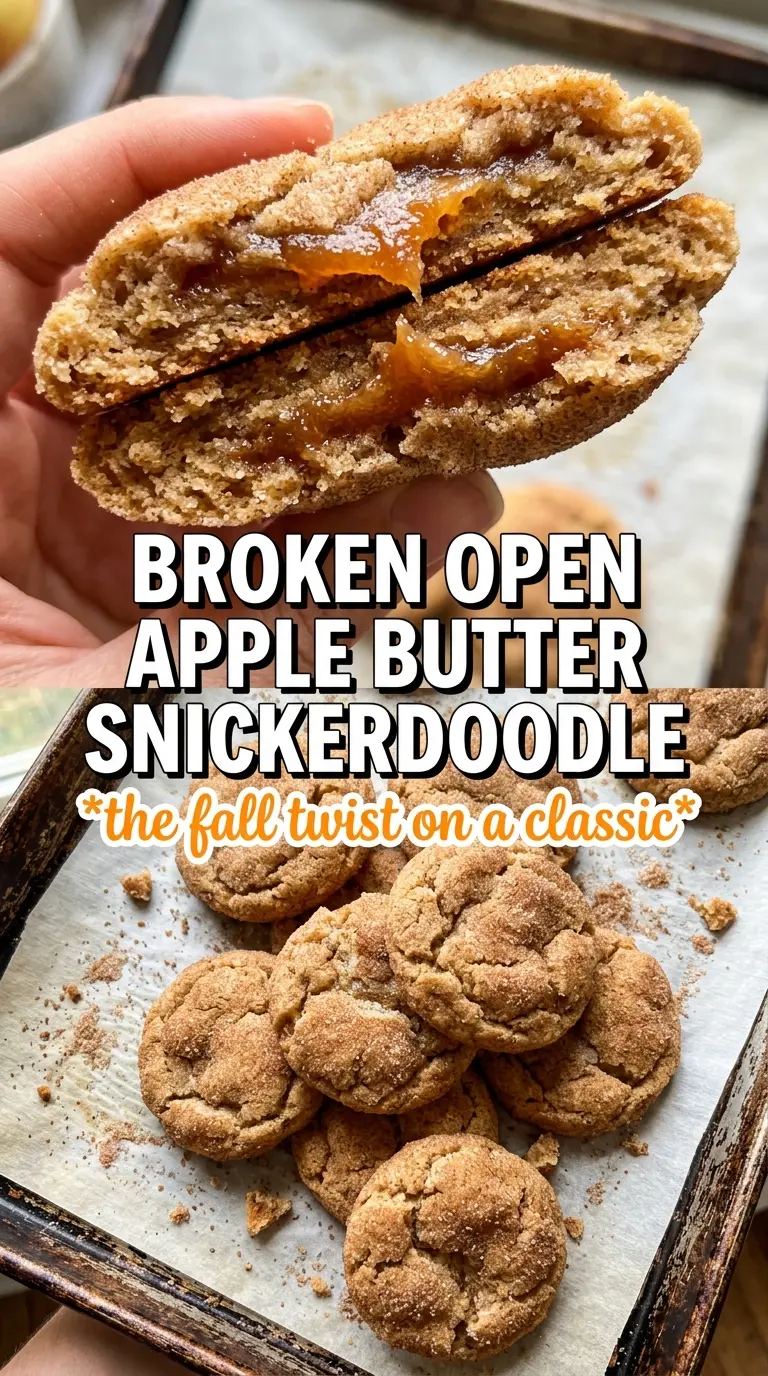
- Apple butter — This is the ingredient that changes the whole cookie. It adds concentrated apple flavor and moisture with a cooked-down depth you can’t get from fresh apples or applesauce. Applesauce will work in a pinch, but the cookies will taste lighter and a little less rich.
- Cream of tartar — Don’t skip it if you want true snickerdoodle texture. It gives the cookies that faint tang and helps create the tender, slightly wrinkled crumb.
- Unsalted butter — Softened butter creams properly and gives you the right amount of spread. If the butter is melted or greasy, the cookies will bake flatter and lose that soft center.
- Cinnamon, nutmeg, and apple pie spice — Cinnamon carries the main flavor, nutmeg rounds it out, and the spice mix on the outside makes the first bite taste warm and familiar. The apple pie spice in the coating is small, but it gives the finish a little extra apple-pie character.
- All-purpose flour — This keeps the cookies sturdy enough to hold their shape while still staying tender. If you add too much, the dough gets stiff and the cookies lose that soft bite.
Getting the Dough Chilled, Scooped, and Baked at the Right Moment
Creaming the Butter and Sugar
Beat the butter and sugar until the mixture looks pale, fluffy, and a little expanded in the bowl. That step matters because it gives the cookies their lift without needing any extra trickery. Once the eggs, apple butter, and vanilla go in, the batter may look loose and glossy, and that’s normal. Stop as soon as the wet ingredients are combined; overbeating here can make the dough greasy and harder to shape.
Bringing the Dough Together
Add the dry ingredients and fold just until no dry streaks remain. The dough will be soft, almost scoopable like a thick batter, and that’s exactly what you want. If it feels sticky enough to cling heavily to your spoon, give it a 30-minute chill. Don’t add extra flour unless the dough is truly unmanageable, or the cookies will bake up dry and lose their softness.
Rolling for That Classic Crinkled Finish
Mix the rolling sugar and spices in a shallow bowl, then coat each dough ball generously. The outside should look heavily dusted, not lightly kissed with sugar. That thick coating helps create the crackled top as the cookies spread in the oven. If the dough is warm, the coating melts too fast and the finish looks dull instead of sparkly.
Baking Until the Edges Just Set
Bake until the cookies are puffed, crinkled, and the edges look set while the centers still look a touch soft. They’ll finish on the pan, so pulling them at the right moment is what keeps them tender. Let them sit on the baking sheet for 5 minutes before moving them. If you transfer them too soon, the centers can collapse and the bottoms can smear while they’re still fragile.
How to Adapt These for Different Kitchens and Batches
Gluten-Free Version
Use a cup-for-cup gluten-free flour blend that includes xanthan gum. The cookies will be a little more delicate, but the cinnamon-sugar coating still gives them a great texture and the apple butter keeps the center from drying out.
Dairy-Free Swap
Swap the butter for a solid plant-based butter stick, not a soft tub spread. You’ll keep the same general texture, though the cookies may spread a little more, so chilling the dough is especially helpful.
Extra-Spiced Coating
If you want a bolder finish, add a pinch more apple pie spice or an extra 1/4 teaspoon cinnamon to the rolling sugar. That gives the outside a more obvious spice-cabinet aroma without changing the cookie dough itself.
Storage and Reheating
- Refrigerator: Store in an airtight container for up to 5 days. They stay soft, though the sugar coating softens a bit after the first day.
- Freezer: Freeze baked cookies for up to 2 months, or freeze scooped dough balls and roll them in sugar right before baking. Dough freezes especially well and bakes up with better texture than thawed baked cookies.
- Reheating: Warm baked cookies in a 300F oven for 3 to 5 minutes. The mistake is using the microwave, which makes the centers gummy and melts the coating instead of freshening the crumb.