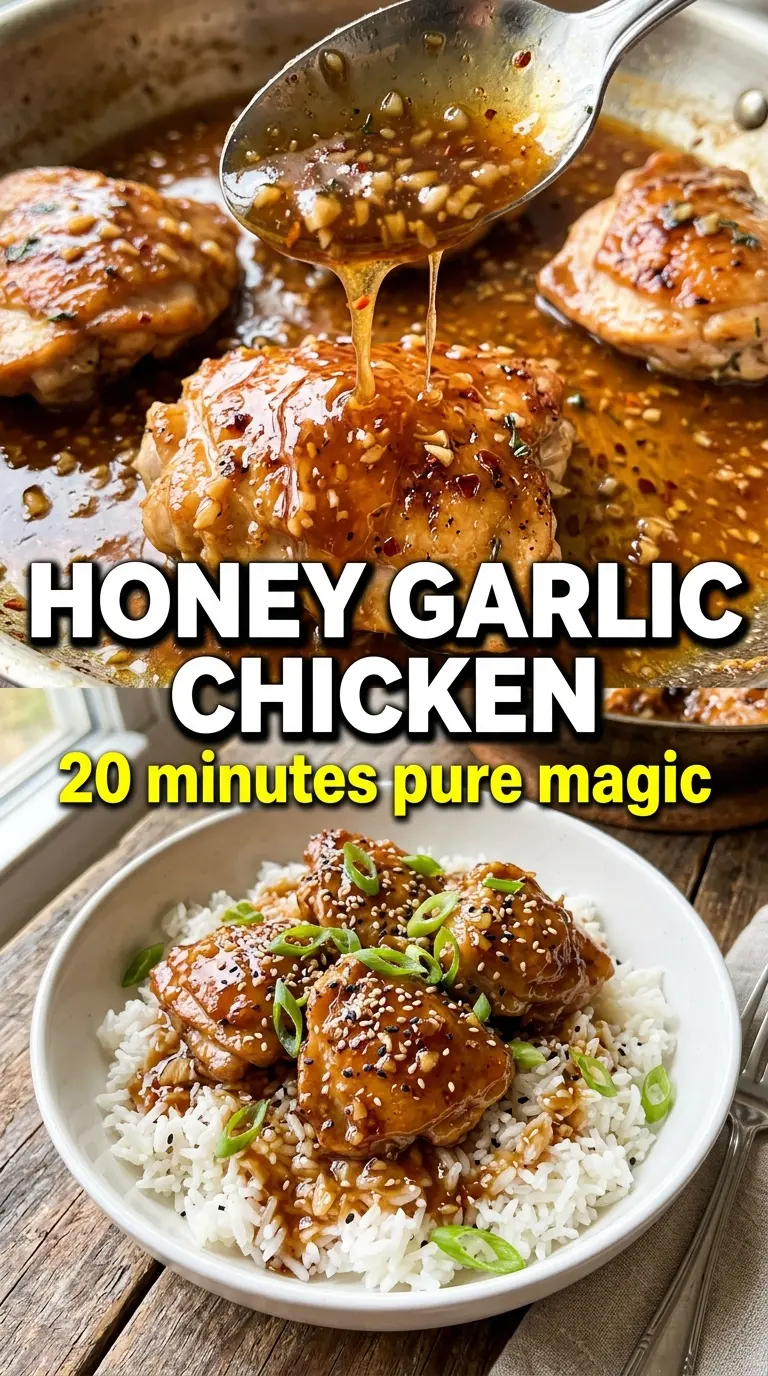
Caramelized chicken breasts coated in a sticky honey garlic glaze are the kind of dinner that disappears fast and leaves the pan looking like the best part of the meal was scraped clean. The sauce clings in a shiny amber layer, with little bits of garlic suspended through it, and every bite lands somewhere between savory, sweet, and just sharp enough from the vinegar to keep things moving.
What makes this version work is the balance in the sauce and the way the chicken is handled. A quick sear builds color before the glaze goes in, and the cornstarch slurry gives the sauce enough body to cling without turning gummy. Butter rounds out the honey and soy, while rice vinegar keeps the sweetness from flattening out.
Below, I’ve laid out the exact cue I watch for when the sauce is thick enough, plus a couple of swaps if you need to adjust the dish for what’s in your kitchen.
The sauce thickened up into that sticky glaze I was hoping for, and the chicken stayed juicy instead of drying out. I served it over rice and my husband went back for seconds before I even sat down.
Save this honey garlic chicken for a sticky skillet dinner with a glossy sauce that clings to every bite.
The Trick to a Glossy Honey Garlic Glaze That Clings
The part that trips most people up is the sauce. Honey wants to stay loose, soy sauce brings salt and water, and garlic can burn before the glaze ever thickens. The fix is simple: build the sauce in the pan after the chicken comes out, then add the cornstarch slurry and let it simmer until it turns syrupy and starts coating the back of a spoon.
That short simmer matters more than extra heat. If the pan is ripping hot, the honey can scorch and the sauce will taste harsh instead of rounded. A steady simmer gives the garlic time to perfume the glaze without turning bitter, and the vinegar keeps the finished sauce from tasting sticky-sweet.
- Searing first — The chicken needs that browned surface before the glaze goes on. Without it, the sauce can taste one-note and the pan won’t have much depth.
- Cornstarch slurry — This is what turns the sauce from thin and shiny into a true glaze. Mix it with cold water before adding it so it disperses cleanly.
- Rice vinegar — It sharpens the sauce just enough to balance the honey. Apple cider vinegar works in a pinch, but it tastes a little louder.
What Each Ingredient Is Actually Doing in This Dish
- Chicken breasts — Boneless, skinless breasts cook quickly and give you a clean canvas for the glaze. If yours are thick in the middle, pound them to an even thickness so the outside doesn’t overcook while the center catches up.
- Honey — This brings the sticky body and the shine. There isn’t a substitute that behaves exactly the same way, but maple syrup will work if you want a deeper, less floral sweetness.
- Soy sauce — This is the salty backbone that keeps the glaze from tasting like candy. Low-sodium soy sauce is the better choice if you want more control over the final balance.
- Butter — Butter softens the edges of the glaze and helps it coat the chicken in a richer layer. If you need dairy-free, use a neutral oil, though the sauce will taste a little less rounded.
- Garlic — Fresh minced garlic matters here. Jarred garlic can work, but it’s softer and less punchy, so the finished sauce won’t have the same sharp warmth.
- Rice vinegar — This is the quiet ingredient that keeps the sauce from feeling heavy. If you don’t have it, use apple cider vinegar, but start with a little less because it’s stronger.
- Cornstarch slurry — The thickener that turns the sauce into a glaze instead of a thin pan sauce. Flour won’t give the same glossy finish and can taste pasty if it isn’t cooked long enough.
Building the Glaze Without Overcooking the Chicken
Seasoning and Searing the Chicken
Season the chicken well before it hits the pan. Salt, pepper, and garlic powder give the surface enough flavor to stand up to the sweet sauce. Cook the chicken in olive oil over medium-high heat until the outside is deep golden and the center reaches 165°F. If the heat is too low, the chicken steams and turns pale instead of getting that browned crust that makes the glaze taste better.
Pulling the Chicken Before the Sauce Starts
Take the chicken out once it’s cooked through. That gives you room to build the sauce in the same skillet without overcooking the meat. The browned bits left in the pan are part of the flavor, so leave them alone. If the pan looks dry, the butter will loosen everything as soon as it melts.
Cooking the Garlic Into the Butter
Let the garlic cook for about a minute, just until it smells fragrant. You want it softened and aromatic, not browned. Burnt garlic turns bitter fast and will pull the whole sauce off balance, so keep the heat moderate once the butter goes in.
Turning the Sauce Into a Sticky Glaze
Stir in the honey, soy sauce, and rice vinegar, then add the cornstarch slurry. Simmer until the sauce thickens and starts to look glossy and elastic, not watery. It should coat a spoon and leave a trail when you drag a finger through it. If it looks too thick, a splash of water loosens it; if it’s still thin, give it another minute or two.
Coating the Chicken at the End
Return the chicken to the pan and turn it in the glaze until every side is lacquered. Let it cook just long enough for the sauce to cling and the chicken to warm through again. Finish with sesame seeds and green onions while the sauce is still hot so they stick instead of sliding off.
How to Adapt This for Different Tables and Pan Sizes
Make It Gluten-Free
Use a gluten-free soy sauce or tamari. The sauce still thickens the same way, and you won’t lose the sticky finish, but regular soy sauce is off the table if you’re avoiding gluten.
Make It Dairy-Free
Swap the butter for a neutral oil or dairy-free butter. You’ll still get a glossy glaze, though the sauce will taste a little less plush and rich than the original.
Use Chicken Thighs Instead
Boneless skinless thighs work beautifully and stay juicier if you’re worried about dry chicken breast. They usually need a few extra minutes in the pan, but they take on the glaze just as well and bring a little more richness.
Stretch It for More Servings
The sauce scales easily, but don’t crowd the skillet with too many chicken breasts at once. If the pan is packed, the chicken steams and you lose the browning that gives the glaze its depth.
Storage and Reheating
- Refrigerator: Store leftovers in an airtight container for up to 4 days. The sauce will thicken as it chills, and the chicken will still hold up well.
- Freezer: It freezes decently, though the glaze can loosen a little after thawing. Freeze in a sealed container for up to 2 months and thaw overnight in the fridge.
- Reheating: Reheat gently in a skillet over low heat with a splash of water to loosen the sauce. Microwaving on high can make the chicken tough and the glaze sticky in the wrong way.
Answers to the Questions Worth Asking

Honey Garlic Chicken
Ingredients
Equipment
Method
- Season the chicken breasts with salt, pepper, and garlic powder, then heat olive oil in a large skillet over medium-high heat until shimmering. Sear until deeply golden and an instant-read thermometer reaches 165°F, 5-6 minutes per side, then remove the chicken to a plate.
- In the same pan, reduce heat slightly if needed and cook the minced garlic with butter for 1 minute until fragrant. Add honey, soy sauce, and rice vinegar, stirring to combine.
- Stir in the cornstarch slurry and simmer 2-3 minutes, stirring, until the sauce thickens into a sticky glaze. Watch for a glossy sheen and slow, ribboning drips from the spoon.
- Return the chicken to the pan and turn to coat thoroughly in the honey garlic glaze. Cook 1-2 more minutes, until the glaze clings and lightly blisters in spots.
- Garnish with sesame seeds and sliced green onions, then serve immediately over steamed rice. Let the sauce pool around the chicken for the most even coating.