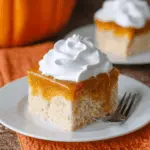
Apple cider cheesecake lands in that sweet spot between familiar and special: a creamy, dense filling with a gentle cider tang, a spiced graham crust, and a glossy cider drizzle that keeps every slice from tasting flat. The texture is what gets people. It slices cleanly after chilling, but the center still melts on the tongue the way a good cheesecake should.
The trick is reducing the cider before it goes into the batter. That concentrates the apple flavor without adding extra liquid that could loosen the filling. I also bake the crust first so it stays crisp under all that cream cheese, and I use a water bath to keep the top smooth instead of cracked and dry. Those small steps are what separate a cheesecake that tastes homemade from one that feels bakery-level.
Below, I’ll walk through the part that matters most: how to keep the filling silky, how to avoid a watery topping, and the little timing details that make this dessert slice beautifully after the chill.
The cider reduction gave the cheesecake a real apple flavor instead of just a hint of spice, and the filling set up beautifully after chilling overnight. My slice came out clean, and the topping stayed glossy instead of running everywhere.
Save this apple cider cheesecake for the kind of dessert that slices cleanly and finishes with a spiced cider drizzle.
The Step That Keeps Apple Cider Cheesecake From Tasting Flat
Most apple cheesecake recipes lean on spices alone and end up tasting like a plain cheesecake with cinnamon on top. The difference here is the reduced cider in the filling. It gives you actual apple flavor, not just sweetness, and it keeps the batter from getting too loose the way raw cider can.
The other place people usually miss is the bake. Cheesecake doesn’t need a hard set in the oven; it needs a center that still has a soft wobble when the edges are done. If you wait until the whole pan looks firm, it will overbake as it cools and turn dry around the rim. The water bath helps the heat stay gentle and even, which is what keeps the surface smooth.
- Reduce the cider first. That one step concentrates the flavor and removes excess water from the filling.
- Bake the crust before filling it. It gives the base a toasted, sturdy layer that won’t turn soggy under the cheesecake.
- Use the water bath. It protects the filling from hot spots and helps prevent cracks.
- Stop baking at the right moment. The center should jiggle slightly when you nudge the pan, not slosh.
What Each Ingredient Is Actually Doing in This Cheesecake

- Cream cheese — This is the body of the cheesecake, and full-fat blocks matter here. Tub-style cream cheese carries too much moisture and can make the filling soft instead of dense and silky. Let it soften fully so it beats smooth without stubborn lumps.
- Reduced apple cider — This is the flavor engine. If you skip the reduction, the filling gets watered down and the apple taste disappears under the dairy. Reduce it to a syrupy 1/4 cup and let it cool before mixing it in.
- Brown sugar — Brown sugar gives a deeper, caramel note that works better than white sugar with cider and warm spices. It also blends into the filling with less sharp sweetness.
- Sour cream — This loosens the batter just enough and adds a slight tang that keeps the cheesecake from tasting heavy. Plain Greek yogurt can work in a pinch, but it will make the filling a little firmer and tangier.
- Graham cracker crust — The cinnamon in the crust echoes the filling and keeps the base from tasting plain. Press it firmly into the pan so it holds together when you slice.
- Cider syrup topping — This is what makes each slice taste complete. Reduce it until it lightly coats a spoon; if it stays thin, it will slide right off the cheesecake instead of sitting on top in a glossy layer.
Building the Filling and Baking It Without Cracks
Pressing and Pre-Baking the Crust
Mix the graham crumbs, sugar, cinnamon, and melted butter until every crumb looks evenly damp, then press it firmly into the bottom of a 9-inch springform pan. Use the bottom of a measuring cup to pack it down tight, especially around the edges, because a loose crust will crumble when you cut the first slice. Bake it for 10 minutes until it smells toasted and looks set. That short bake gives the crust a head start and keeps it from going soft under the filling.
Mixing the Batter Without Overworking It
Beat the cream cheese and brown sugar until the mixture is smooth before adding anything else. If the cream cheese is still cold, you’ll end up chasing lumps later and overmixing the batter to fix them. Add the reduced cider, then the eggs one at a time, followed by the sour cream, cinnamon, nutmeg, and vanilla. Once the eggs go in, keep the mixing gentle; too much air in the batter is one of the main reasons cheesecakes puff, crack, and sink.
Baking Until the Center Still Moves
Pour the filling over the crust and set the pan in a water bath. Bake at 325°F for 55 to 60 minutes, but start checking early because ovens vary. The edges should look set and slightly puffed, while the center still has a soft wobble when you nudge the pan. If the top starts to brown too much, your oven is running hot and the cheesecake is getting too much direct heat.
Chilling Before the Topping Goes On
Let the cheesecake cool completely at room temperature before it goes into the refrigerator. If you rush it into the fridge while it’s still hot, condensation will form and the top can turn damp instead of clean and smooth. Chill it for at least 6 hours, though overnight is even better for the neatest slices. Don’t add the cider topping until the cheesecake is fully cold, or the glaze will melt into the surface.
Three Ways to Adjust This Cheesecake Without Losing the Point
Gluten-Free Crust Swap
Use gluten-free graham-style crumbs in the same amount. The texture stays nearly identical as long as you still mix them with melted butter until the crumbs hold together when squeezed. This swap keeps the crust crisp without changing the flavor balance.
Dairy-Free Version
Use dairy-free cream cheese and a thick plant-based sour cream, but expect a slightly softer set and a less tangy finish. The cider reduction becomes even more important here because it carries the apple flavor that dairy would normally help round out. Chill it overnight before slicing.
Make It Less Sweet
Cut the brown sugar in the filling slightly and keep the cider topping as written. That gives you a more tangy, grown-up cheesecake without losing the apple character. Don’t reduce the sugar in the crust too much or it will taste plain against the filling.
Storage and Reheating
- Refrigerator: Store covered for up to 5 days. The texture stays firm and clean-slicing, though the crust will soften a little over time.
- Freezer: Cheesecake freezes well. Wrap individual slices tightly, then freeze for up to 2 months. Thaw in the refrigerator overnight for the best texture.
- Reheating: Don’t reheat the cheesecake itself. Serve it chilled or just slightly softened at room temperature for 15 to 20 minutes. Warming it will loosen the filling and make the cider topping run.
Answers to the Questions Worth Asking

Apple Cider Cheesecake
Ingredients
Equipment
Method
- Reduce 1/2 cup apple cider until it becomes syrupy, then cool completely. Keep the reduction aside for the cheesecake filling so it won’t cook the eggs early.
- Preheat the oven to 325F. Press the crust mixture into a 9-inch springform pan and bake for 10 minutes, until set and fragrant.
- Beat the cream cheese and brown sugar smooth. Stop when no lumps remain so the filling bakes silky.
- Add the reduced cider and mix briefly. The batter should look glossy and evenly colored.
- Add the eggs one at a time and mix on low just to combine. Stop once each egg disappears to help prevent cracks.
- Add the sour cream, cinnamon, nutmeg, and vanilla and mix until smooth. Scrape the bottom and sides so spices are evenly distributed.
- Pour the filling over the baked crust. Tap the pan lightly so air bubbles rise to the surface.
- Bake in a water bath at 325F for 55-60 minutes, until the center is just set. The edges should look firm while the middle still has a slight jiggle.
- Cool the cheesecake completely before refrigerating. This helps the texture set without weeping.
- Refrigerate for 6 hours. Chill until the cheesecake slices cleanly with a dense, creamy crumb.
- Simmer the cider syrup topping (1 cup apple cider, brown sugar, and cinnamon) until reduced by half. Cook until thick enough to coat a spoon.
- Drizzle the spiced cider syrup over each slice. Use a spoon to guide the syrup into a glossy, even pattern.