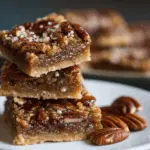
Salted caramel pretzel bark hits that sweet-salty-crunchy lane with almost no effort, and the payoff is bigger than the ingredient list. You get a glossy layer of caramel tucked into pretzels, then a smooth blanket of chocolate on top that sets into pieces with a clean snap. The flaky salt at the end isn’t decoration; it’s what keeps the bark from tasting one-note.
The trick is giving the caramel its full 3 minutes at a real boil. That’s what cooks off enough moisture to help it firm up later instead of staying sticky under the chocolate. I also like baking the pretzels for a few minutes after the caramel goes on, because it helps everything fuse together and gives the bark that candy-like structure that breaks in satisfying shards.
Below you’ll find the timing cues that matter most, a few ingredient notes that save you from a soft or grainy caramel, and a couple of variations if you want to switch up the chocolate or make it a little more your own.
The caramel set up with the perfect snap and the pretzels stayed crunchy underneath. I used the full 3 minutes at a boil like you said, and the bark broke into clean pieces instead of turning sticky.
Save this salted caramel pretzel bark for the days when you want a crackly chocolate layer, chewy caramel, and salty crunch in one pan.
The Part That Keeps the Caramel from Staying Sticky
The biggest mistake with bark like this is undercooking the caramel. If you only heat the butter and sugar until they look combined, the finished bark stays tacky and the pretzels can soften underneath. A full boil for exactly 3 minutes gives the sugar enough time to cook into a firmer candy layer, which is what lets the bark break instead of bend.
The other thing that matters is spreading the caramel over a single layer of pretzels before it goes into the oven. That short bake helps the caramel seep into the cracks and glues the whole sheet together. Skip that step and you can end up with chocolate sitting on top of loose pretzels instead of a proper bark.
- Mini pretzels — Their shape gives you crunch and little pockets for caramel to catch. Bigger pretzels work, but they don’t give the same even coverage or clean break.
- Brown sugar — This is where the caramel flavor comes from. Light or dark brown sugar both work; dark brown sugar brings a deeper molasses note, while light keeps it cleaner and sweeter.
- Unsalted butter — Unsalted butter keeps the caramel from tipping salty before the finishing salt goes on. If salted butter is all you have, use it and reduce the flaky salt a little at the end.
- Semi-sweet and dark chocolate chips — The mix gives the bark a balanced top layer. All semi-sweet works if that’s what you’ve got, but the dark chocolate keeps the sweetness in check and gives the bark a sharper snap.
What Each Ingredient Is Actually Doing in This Recipe
- Primary ingredient (the star) — Quality matters most. Choose the best you can find.
- Cooking medium (oil, butter, or broth) — This carries flavors and prevents dryness.
- Seasonings (salt, pepper, spices, herbs) — Layer flavors so nothing overpowers. Build depth gradually.
- Aromatics (garlic, onion, herbs) — Cook with fat to bloom flavors. Become the foundation.
- Supporting ingredients — Complement the main ingredient without overpowering it.
- Sauce or liquid (if applicable) — Brings flavors together. Balance richness with acid.
- Acid (lemon, vinegar, wine, or other) — Brightens and prevents flat-tasting results.
- Final finish (garnish, glaze, or sauce) — Prevents one-dimensional taste and adds visual appeal.
Building the Bark So the Layers Stick
Getting the Pretzel Base Ready
Line the pan with foil and a light coating of cooking spray so you can lift the bark out cleanly after it sets. Spread the pretzels in a single layer with as few gaps as possible, because the caramel needs something to cling to. If the pretzels overlap too much, the caramel pools in spots and you get uneven pieces later.
Cooking the Caramel to the Right Point
Melt the butter and brown sugar over medium heat, then bring it to a boil without stirring once it starts bubbling. Stirring can encourage grainy crystals and interrupt the even boil you need for a smooth caramel. Watch for a steady bubble across the whole surface and set a timer for 3 minutes from the moment it reaches a real boil.
Using the Oven as the Glue Step
Pour the hot caramel over the pretzels as evenly as you can, then bake for 5 minutes. That short trip in the oven softens the caramel just enough to seep down into the pretzels and bind everything together. The pan should come out looking glossy and bubbling at the edges, not dark or burnt.
Finishing the Chocolate Layer
Scatter the chocolate chips over the hot caramel and let them sit untouched for 2 minutes. That pause matters because it gives the chocolate time to soften without overheating, which keeps it smooth instead of chalky or seized. Then spread from the center outward with a spatula until the top is even, and finish with flaky sea salt while the chocolate is still soft so it sticks.
What to Change When You Want a Different Kind of Bark
Gluten-Free Version
Use certified gluten-free pretzels and keep everything else the same. The texture stays crisp and the bark still sets up the same way, so this is an easy swap as long as the pretzels you choose hold their shape in the oven.
Dairy-Free Version
Swap in plant-based butter that melts and browns like real butter, then use dairy-free chocolate chips. The bark will still set, but the caramel flavor is a little less rich, so the flaky salt matters even more to keep the layers tasting balanced.
White Chocolate Drizzle Finish
The white chocolate drizzle is optional, but it gives the bark a sweeter finish and a prettier look if you’re making it for a tray or gift tin. Melt it gently and drizzle in thin ribbons after the chocolate layer has been spread, not before, or it will disappear into the top instead of sitting on the surface.
Storage and Reheating
- Refrigerator: Store in an airtight container for up to 2 weeks. The bark stays crisp, but the chocolate may show slight condensation if you pull it straight from the fridge into a warm room.
- Freezer: It freezes well for up to 2 months. Layer pieces between parchment in a sealed container so they don’t stick together, then thaw in the fridge or at room temperature.
- Reheating: No reheating is needed. If the bark feels too cold and hard from the fridge, let it sit at room temperature for 10 to 15 minutes before serving so the caramel doesn’t crack too aggressively when you bite it.
Answers to the Questions Worth Asking

Salted Caramel Pretzel Bark
Ingredients
Equipment
Method
- Preheat oven to 350F. Line a 15x10 rimmed baking sheet with foil and spray with cooking spray for easy release.
- Spread the mini pretzels in a single layer on the prepared baking sheet and set aside so they don’t overlap.
- Melt the butter and brown sugar in a saucepan over medium heat. Bring to a boil and cook exactly 3 minutes without stirring.
- Pour the caramel evenly over the pretzels. Use a steady pour so the pretzel layer is fully covered.
- Bake for 5 minutes at 350F. Remove from the oven when the caramel looks bubbling at the edges.
- Immediately scatter both the semi-sweet chocolate chips and dark chocolate chips over the hot caramel. Let sit for 2 minutes so the chips soften.
- Spread the melted chocolate over the surface with a spatula until smooth. Scrape gently to cover the caramel evenly.
- Sprinkle generously with flaky sea salt over the chocolate. Let the salt look clearly visible across the whole surface.
- Drizzle with white chocolate if using. Move in thin lines so it contrasts against the dark chocolate.
- Refrigerate for 1 hour until set. The bark should look firm and matte rather than glossy-wet.
- Break into pieces for serving. Aim for irregular shards so every bite shows pretzel, caramel, and chocolate layers.